As Spring Boot is a very popular choice for building applications in Java, many cloud platforms provide excellent support for deploying boot applications. Pivotal, the company behind the Spring framework, has ensured that Spring Boot is a first-class citizen on Pivotal Cloud Foundry (PCF), its cloud platform. In this lab, we deploy the demo application to PCF, and explore what support PCF provides for deploying, running, and otherwise managing Spring Boot applications.
1. Deploy demo to PCF
1.1. Get an account
For this lab, we will use Pivotal Web Services (PWS), a public installation of PCF. The first thing we need is an account.
-
Head over to the PWS home page at http://run.pivotal.io/
-
Click the big green "Sign up for free" button and setup a free trial account. The process involves a two-factor authentication mechanism whereby you’re sent a text message with an access code.
-
Once you have an account and are logged in, you’ll be prompted to create your first "org". Give it a name and click the "Create Org" button
You should end up at a screen that resembles the following:

Orgs contain spaces. Initially no spaces may exist in your newly-created org. If so, create yourself a space: click the "Add a space" button, name it dev or development. Drill in to your space by clicking anywhere in the area representing it.
1.2. Install the CLI
Applications are deployed to PCF with the cf Command Line Interface (the cf CLI, for short).
Verify whether the cf cli is already installed on your machine with the following command:
$ cf version
cf version 6.37.0+a40009753.2018-05-25
If you get a reply with a specific version number, you should be all set. If not, then your next step is to download and install the CLI.
➜ In the navigation panel on the left hand side, click on the link labeled Tools.
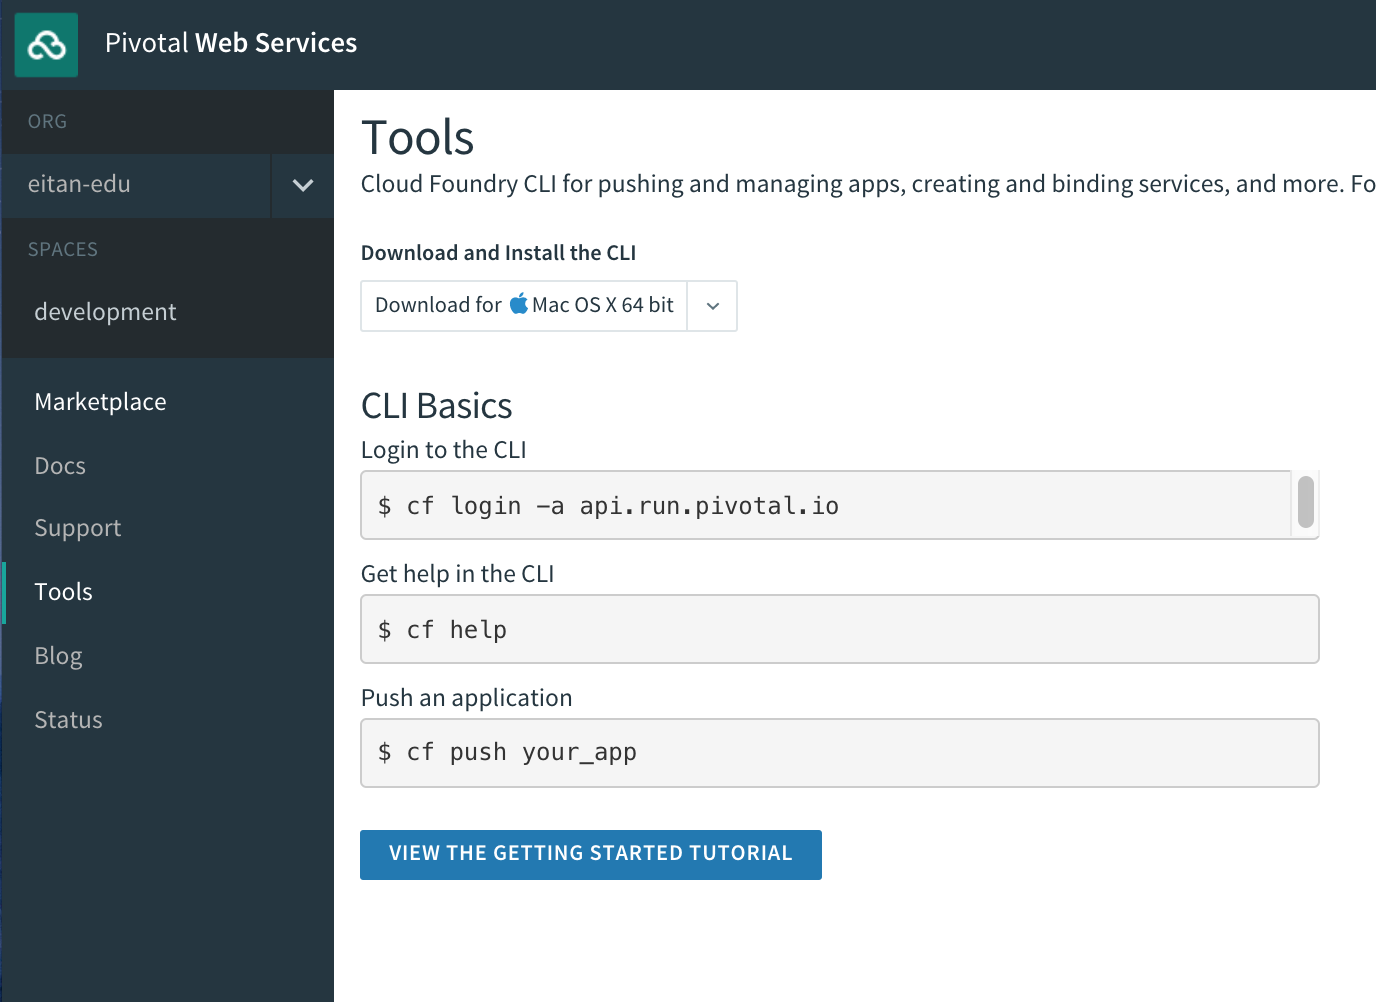
The tools page has a simple download link, along with instructions for logging in.
➜ Download the cf cli. After download, proceed to locate the downloaded file, and run the installer.
1.3. Logging In
|
If you’re working on a windows OS, the cf cli’s |
Open a terminal, and log in to PWS from the command line:
➜ Type cf login
You’ll be prompted to enter three pieces of information:
-
For the API endpoint, enter
api.run.pivotal.io -
Enter your username
-
Enter your password
1.4. Write the deployment manifest
We could at this point deploy the demo application with a single command. But let’s do this formally, by writing a deployment manifest.
PCF deployment manifests are written in YAML, have the conventional name manifest.yml, and typically reside in the base directory of your application or project. To learn more about the deployment manifest format and the many options supported, see https://docs.cloudfoundry.org/devguide/deploy-apps/manifest.html
➜ Create the file manifest.yml in the base directory of your project, and compose the manifest.
Here’s an example:
---
applications:
- name: demo
  path: build/libs/demo-0.0.1-SNAPSHOT.jar
  memory: 768M
  random-route: true
The contents of the file are relatively easy to understand. We specify:
-
An application named
demo, -
The path to the jar file we wish to deploy,
-
How much memory to dedicate to the running application, and
-
We instruct PCF to assign a random route, or url, to our application.
➜ In a terminal, navigate to the demo application’s base directory, build your application (to ensure you have a jar file to deploy), and enter the command cf push:
$ cd demo
$ gradle build
$ cf push
Observe the console output as the application is uploaded and deployed to PCF. After the application is deployed, make note of its url.
Back in the apps manager web UI, navigate to your space and click on the tab named Apps. The demo application should appear in the listing, in the running state.
2. Integrations with Applications Manager
The PCF Apps Manager is well-integrated with Spring Boot applications, specifically the Spring Boot actuator endpoints.
➜ From the view of the space, drill down into a view of the running application by clicking on its corresponding row
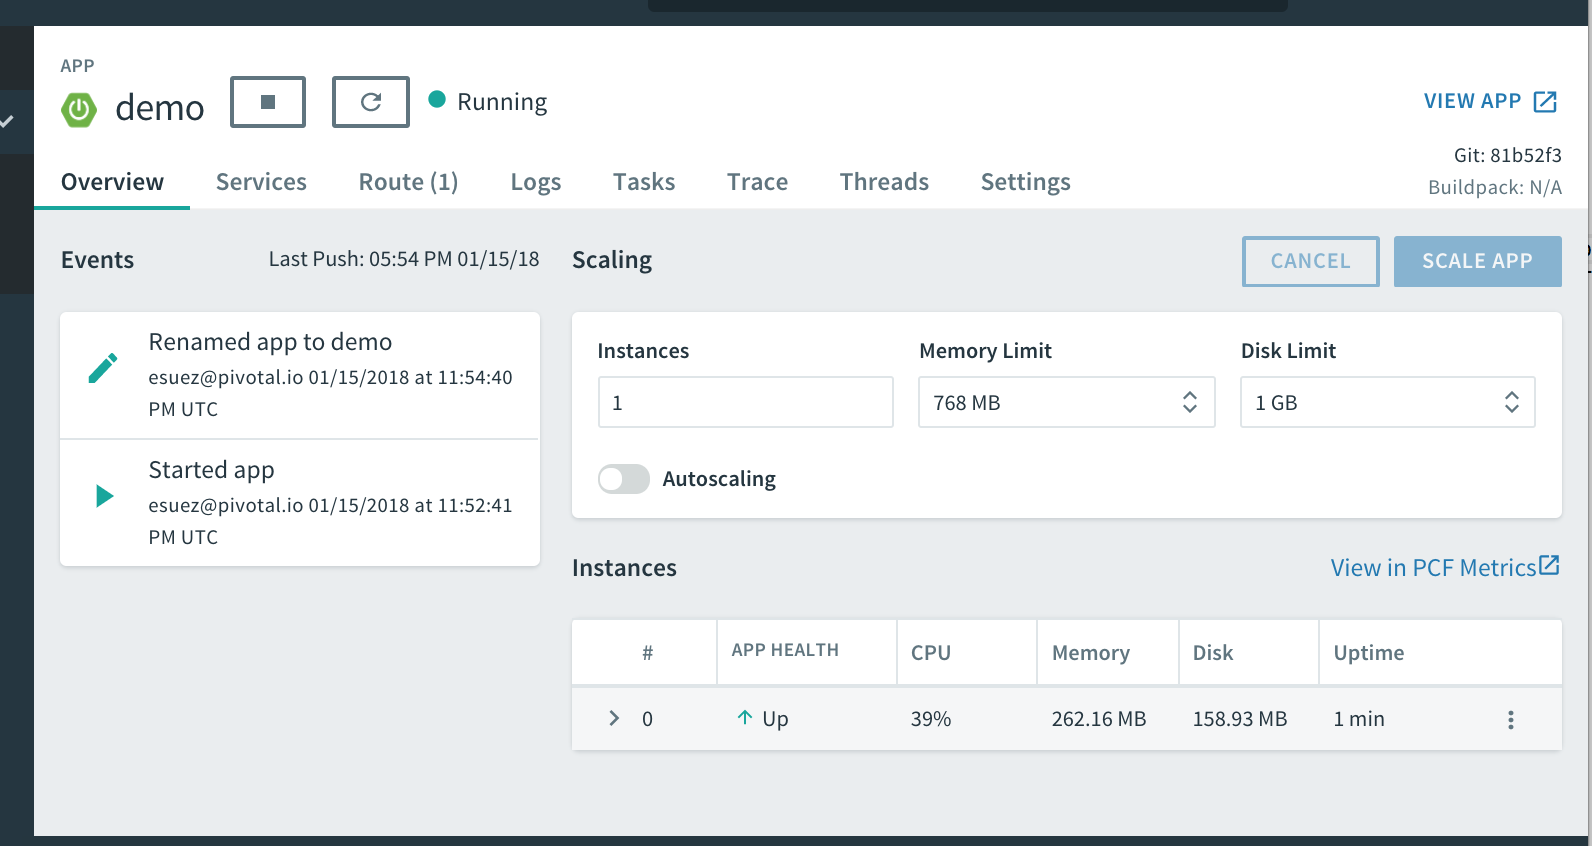
The Spring Boot logo in the upper left hand corner indicates that the Apps Manager has detected our application as a Spring Boot application.
2.1. Health Endpoint Integration
➜ In the instances area on the right hand side, click on the [one and only] instance row to expand it:
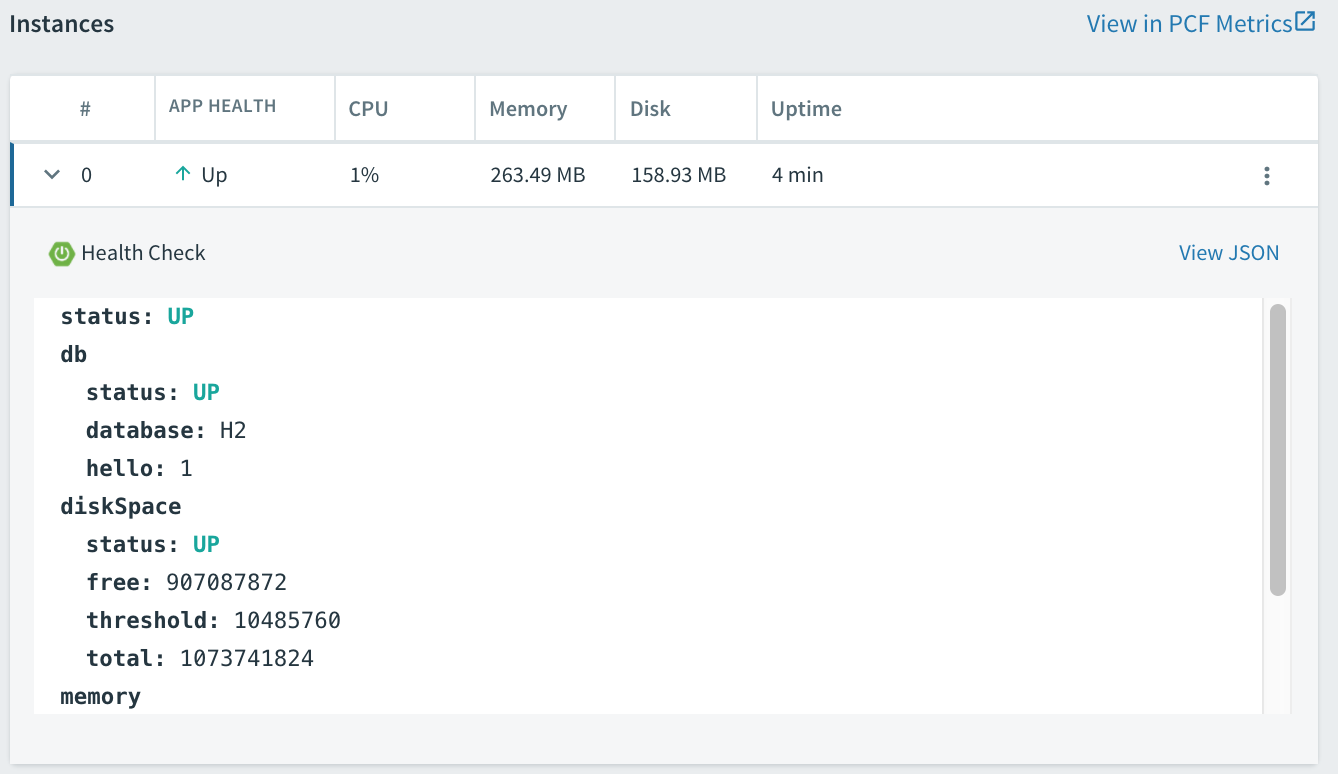
PCF monitors the health of the application via the health endpoint.
2.2. Build Info
Click on the tab labeled Settings. Scroll down a little to the Spring Info section:
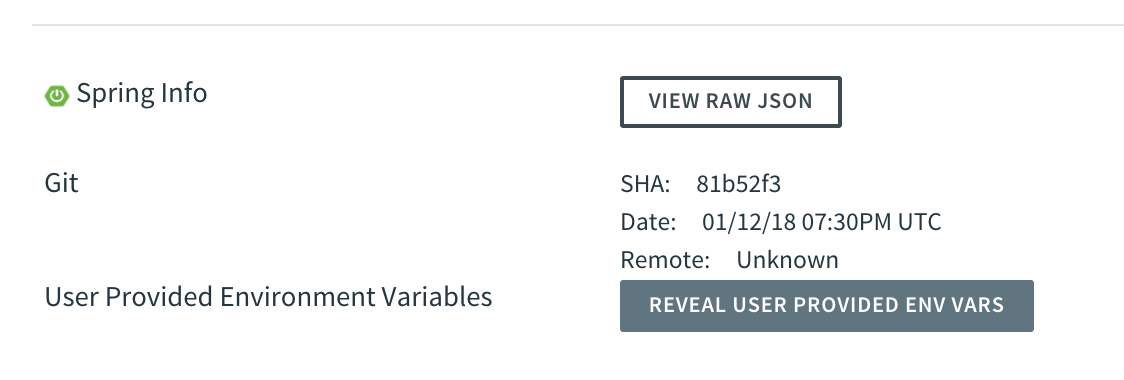
Click on the button "View raw JSON". The dialog displays the contents of the /info endpoint (build number, git sha-1, etc..)
2.3. Logs
Click on the tab labeled Logs. Not only can we view the logs, but we can configure the logging levels via the /loggers actuator endpoint:
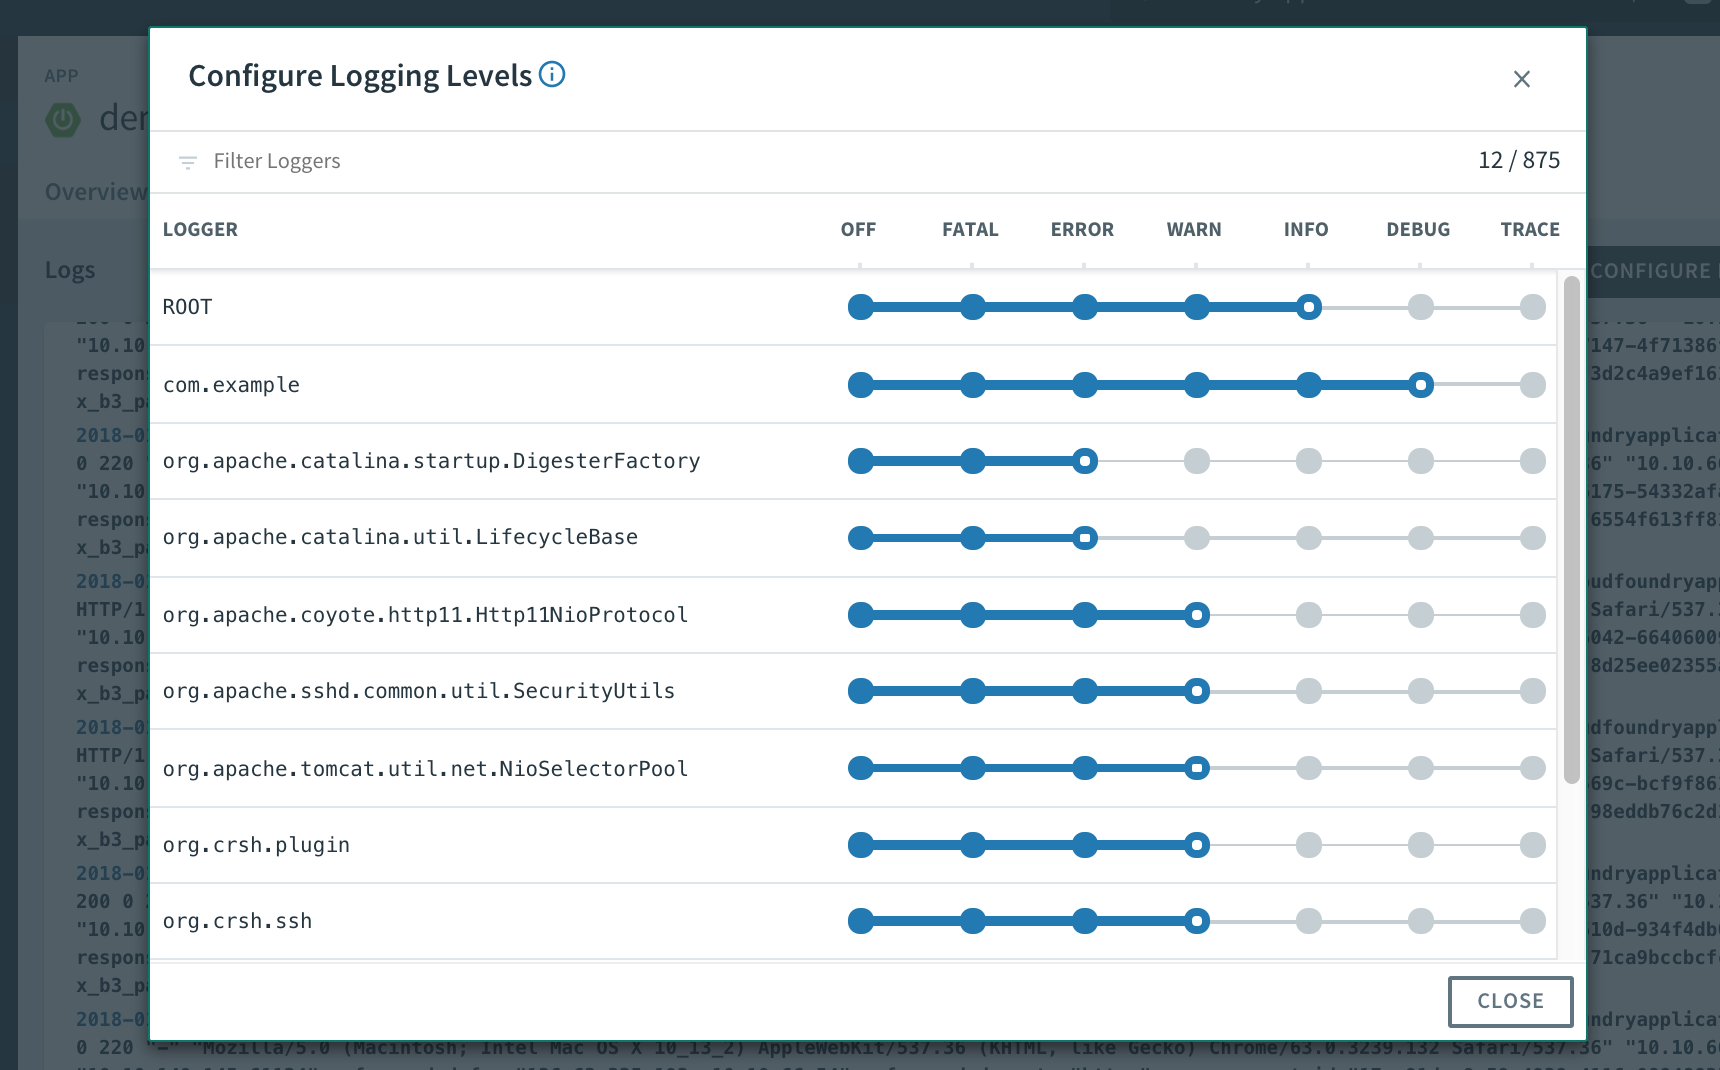
Note how the ROOT logger is set to INFO and the logger for the com.example package is at DEBUG, per the application’s initial configuration.
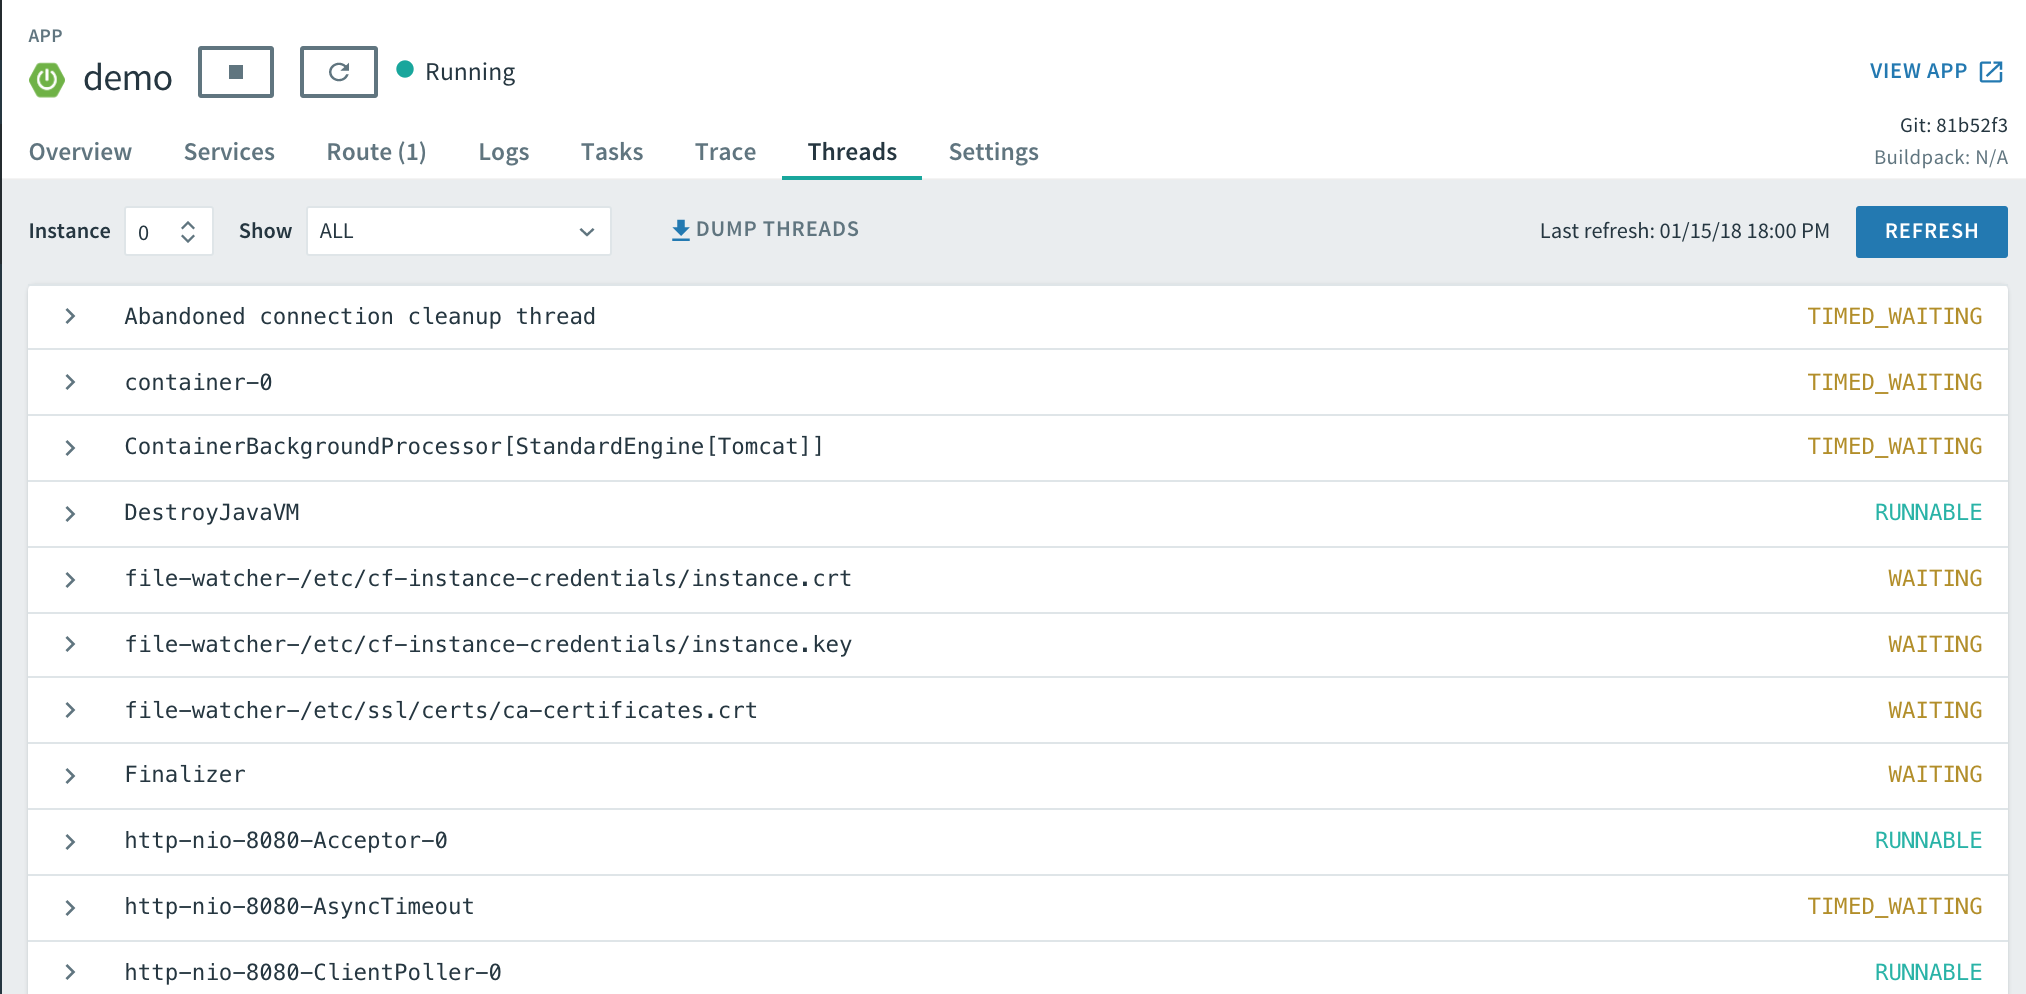
2.4. Threads
The Threads tab gives us a rich view of running threads as well as a button to obtain a thread dump:
2.5. Trace
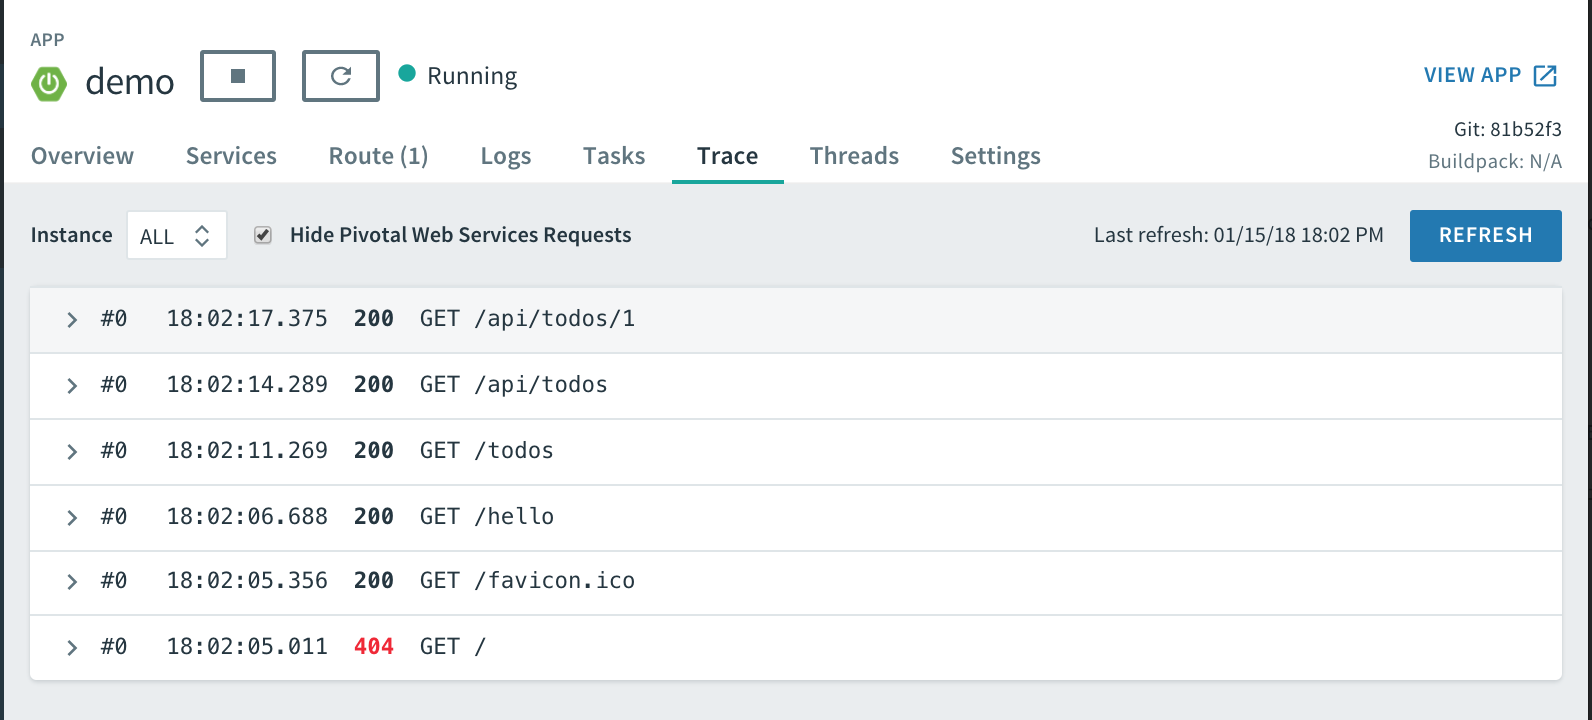
Click the View App button in the upper right-hand corner, and visit the application’s endpoints: /hello, /todos, /api/todos, /api/todos/1.
In the Apps Manager, click on the tab labeled Trace, where you’ll find a listing of recent HTTP requests (you may need to click the "REFRESH" button):
All of the above are custom integrations for Spring Boot. To find out more about these integrations, see these sections of the PCF reference guide:
3. Mysql Profile
In a previous lab on Spring Data with JPA, was an optional section to configure demo to work with a mysql database, by activating the Spring Profile mysql. Let’s redeploy demo to PCF with a mysql backing database.
3.1. Create a backing database
Review the service marketplace in PWS for a service that provisions instances of mysql:
$ cf marketplace
Here’s the output:
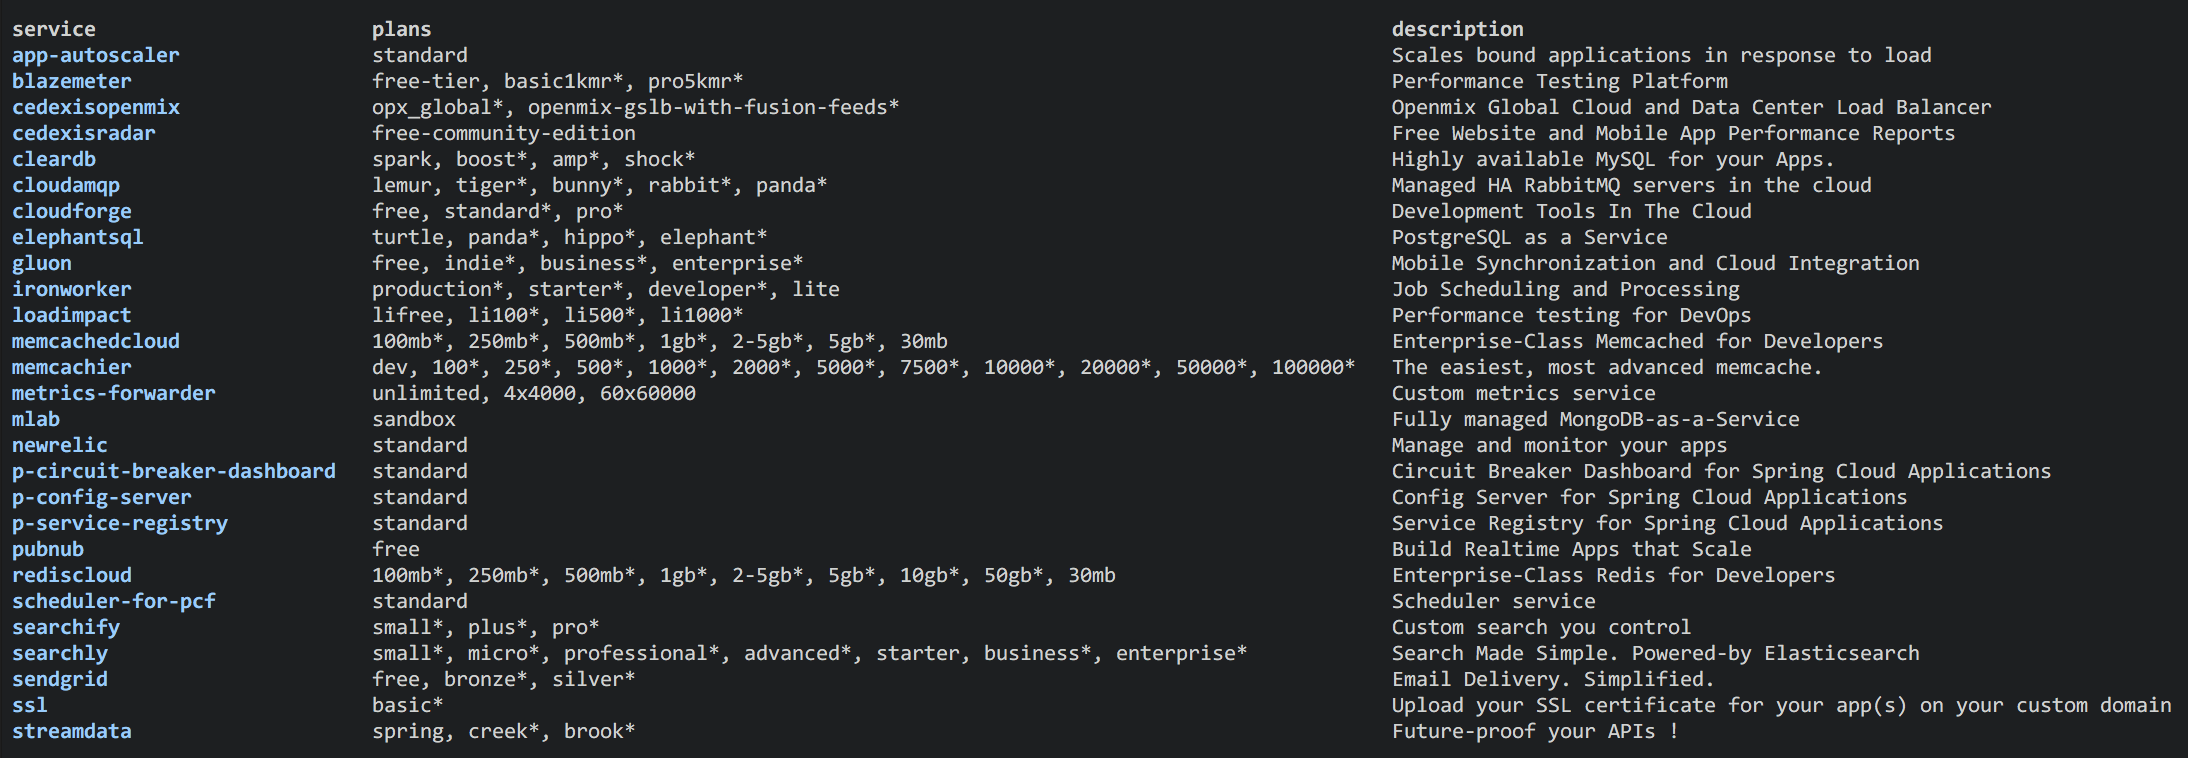
On that list is a service named cleardb which fits our needs.
Create a mysql instance in the cloud with the following command:
$ cf create-service cleardb spark todos_db
We now have a mysql database.
3.2. Bind the application to the database
In Cloudfoundry, the process of attaching an application to a backing service such as a database is called binding.
We can bind this database to our demo application by specifying it in the manifest file under services, like so:
@@ -4,3 +4,5 @@ applications:
   path: build/libs/demo-0.0.1-SNAPSHOT.jar
   memory: 768M
   random-route: true
+  services:
+  - todos_db
Our application running in Cloudfoundry will no longer read the mysql connection information from the application.yml file. This information will now come from an environment variable. And so, technically we don’t need to bother to even set the application’s active profile to mysql.
But we are missing one configuration property: spring.jpa.generate-ddl. We need to set that to property so that when the application starts up, it will create the necessary tables. That setting can also be applied in the manifest, as an environment variable, like this:
@@ -6,3 +6,5 @@ applications:
   random-route: true
   services:
   - todos_db
+  env:
+    SPRING_JPA_GENERATE-DDL: true
We’re now ready to effect the switch over to mysql:
➜ Redeploy the application
$ cf push
One simple way to test that we’re no longer using an in-memory database is to:
-
HTTP POST a new Todo to the API endpoint
/api/todos. -
Restart the application with
cf restart demo. -
Verify that the newly added todo is still displayed
With an in-memory database, the Todo we just created would not have survived a restart.
Another way is to use the cf mysql plugin to connect directly to the database and inspect the contents of the todo table.
4. How does it work?
In the above task, it’s important to point out that the deployment of the application, and configuration of the connection to the database "just worked." We didn’t have to alter the application’s code or configuration.
Let’s take a little time to understand exactly what’s happening.
4.1. VCAP_SERVICES
Binding the todos_db service to the application had the effect of populating an environment variable named VCAP_SERVICES. We can inspect it with this command:
$ cf env demo
So the information that the application needs to setup its database connection is right there, in the form of a JSON block that can be read, parsed, and used.
4.2. The Cloud Profile
If you recall, When we deployed the application locally, we configured the datasource parameters through the application.yml file:
---
spring:
  profiles: mysql
  datasource:
    url: jdbc:mysql://localhost:3306/todos
    username: todo_user
    password: secret
  jpa:
    generate-ddl: true
When running in PCF, this information is not applicable. Instead of the above, Spring Boot uses the information from VCAP_SERVICES.
But how does the application know whether it’s running locally on in the cloud?
➜ Visit your application’s actuator environment endpoint (/actuator/env) in cloud foundry:
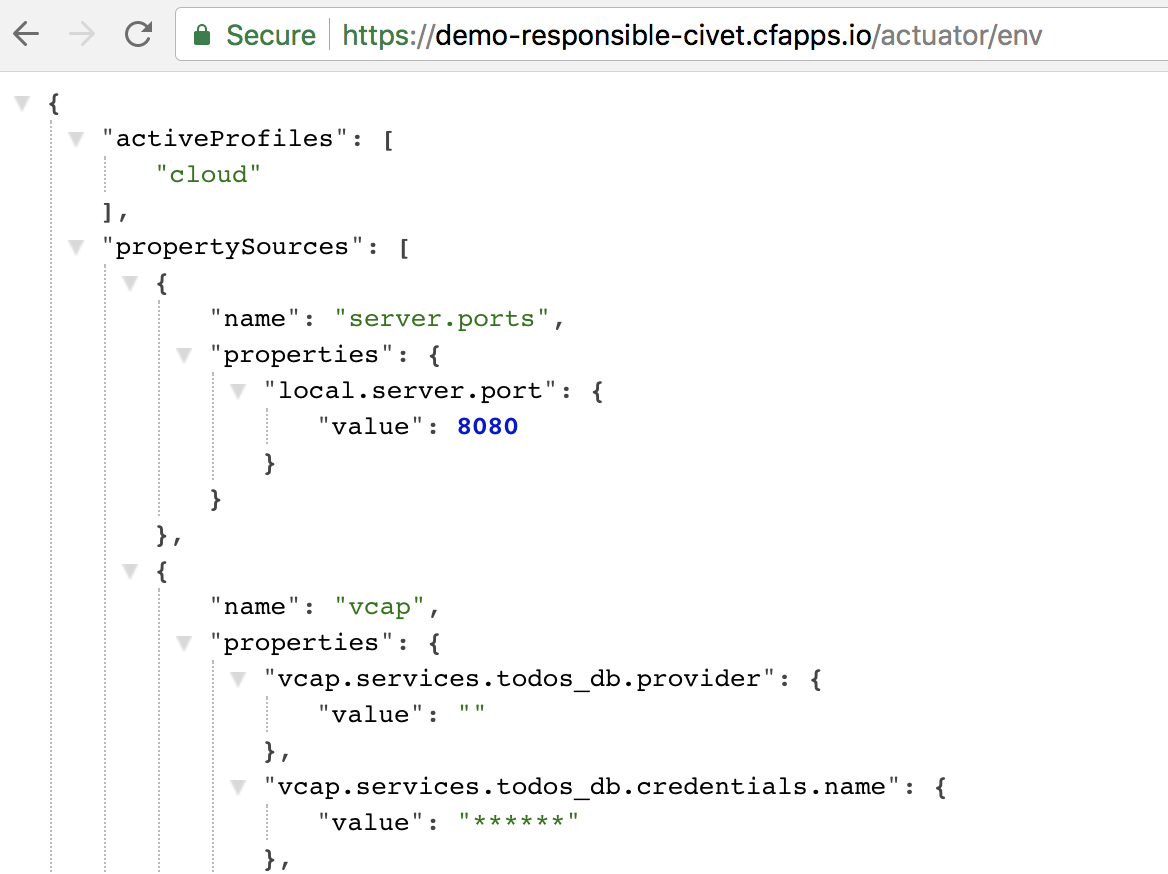
The list of active profiles shows that when the application runs in Cloudfoundry, the cloud profile is added to the list.
4.3. The Java Buildpack and Spring Auto Reconfiguration
To understand how the application obtained this additional profile, we have to understand how the application is deployed.
Here is a screenshot of some of the console output when we ran cf push:
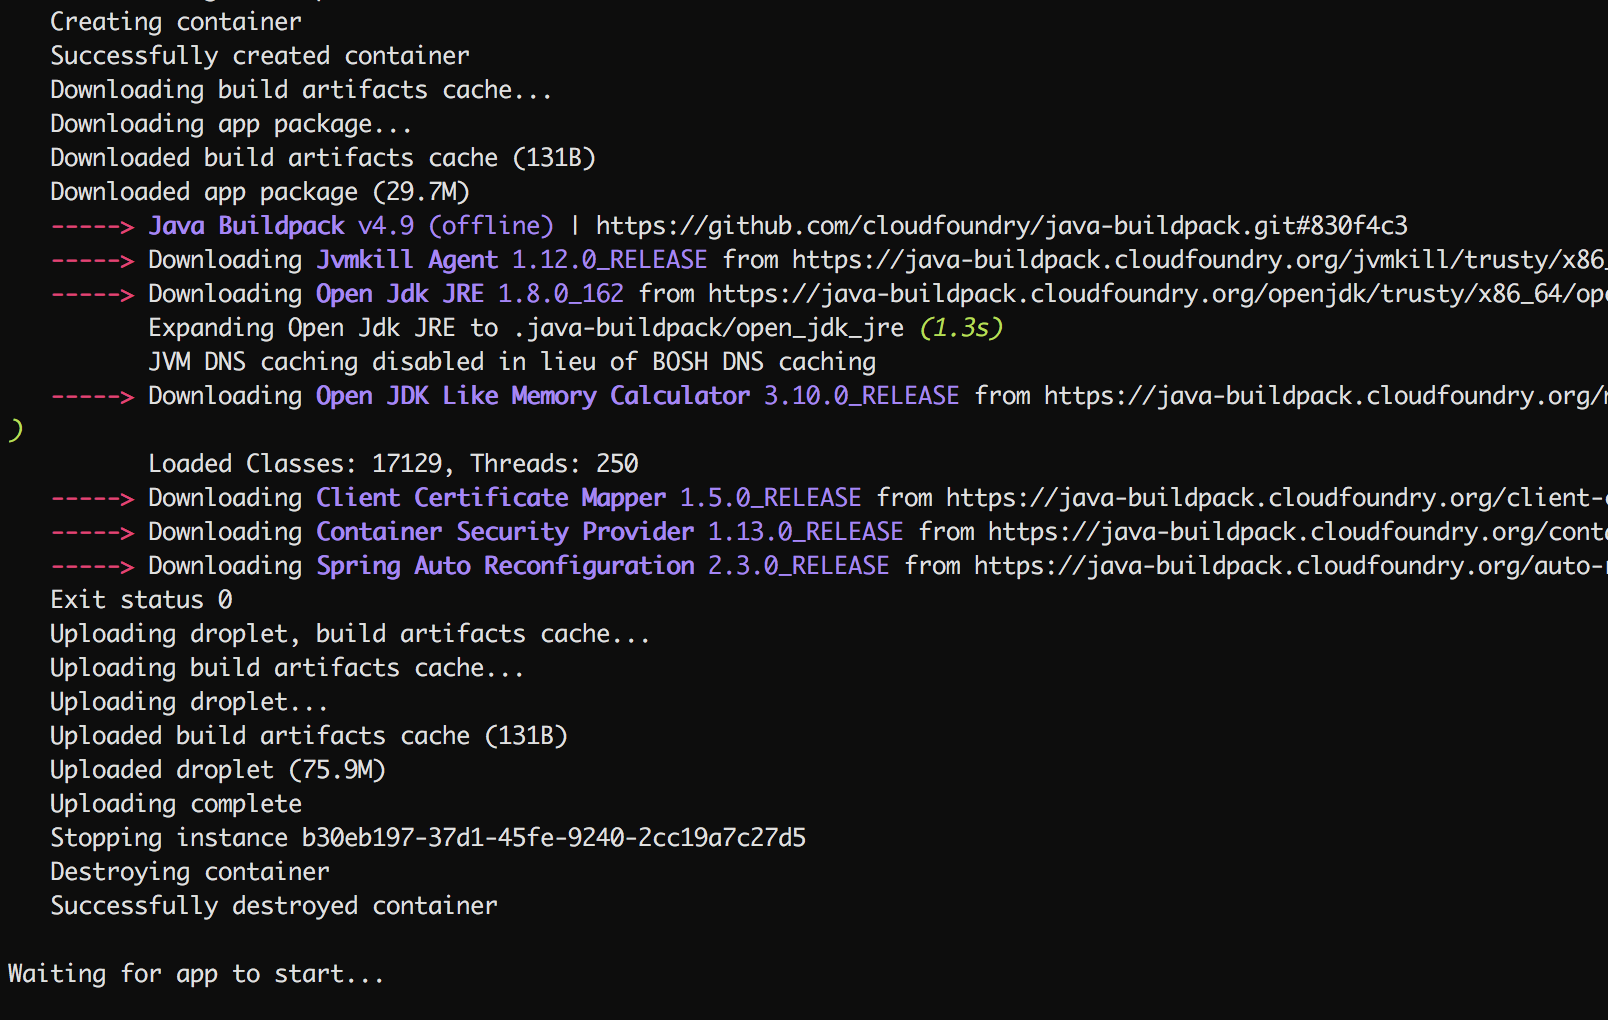
See the line that says "Downloading Spring Auto Reconfiguration.."?
The Java buildpack (the mechanism that assists with the deployment of the application) detects that we’re pushing a Spring Boot application, and so it bundles an extra library, known as the auto-reconfiguration lilbrary. This library ends up in the classpath of our application, and, as its name implies, it reconfigures the application.
It is this code that adds the cloud profile, but it goes a step further: it transitively pulls in another library named the Spring Cloud Connectors, which looks for and parses the VCAP_SERVICES environment variable. The reconfiguration library then replaces the DataSource bean with one configured from this information.
The net effect is an application that, without modification, will "just work" both locally and in the cloud.