1. Turn the application into a web app
In build.gradle, modify the spring-boot-starter dependency to spring-boot-starter-web (the latter includes the former):
 dependencies {
-  compile 'org.springframework.boot:spring-boot-starter'
+  compile 'org.springframework.boot:spring-boot-starter-web'
   testCompile 'org.springframework.boot:spring-boot-starter-test'
}| You’ll need to refresh your IDE’s project configuration to match the updated gradle build file. In IntelliJ there’s a convenient "use auto-import" option for gradle. In STS, you can right-click on the project, select 'Gradle' from the context menu, where you’ll find a sub-option to refresh the eclipse project definition from the gradle definition. |
Next, revise application.yml and undo the logging configuration for the root logger
@@ -1,7 +1,6 @@
 ---
 logging:
   level:
-    root: WARN
     com.example: DEBUG

 hello:
Now, re-run the application, either from the IDE or the command line:
$ gradle bootRun
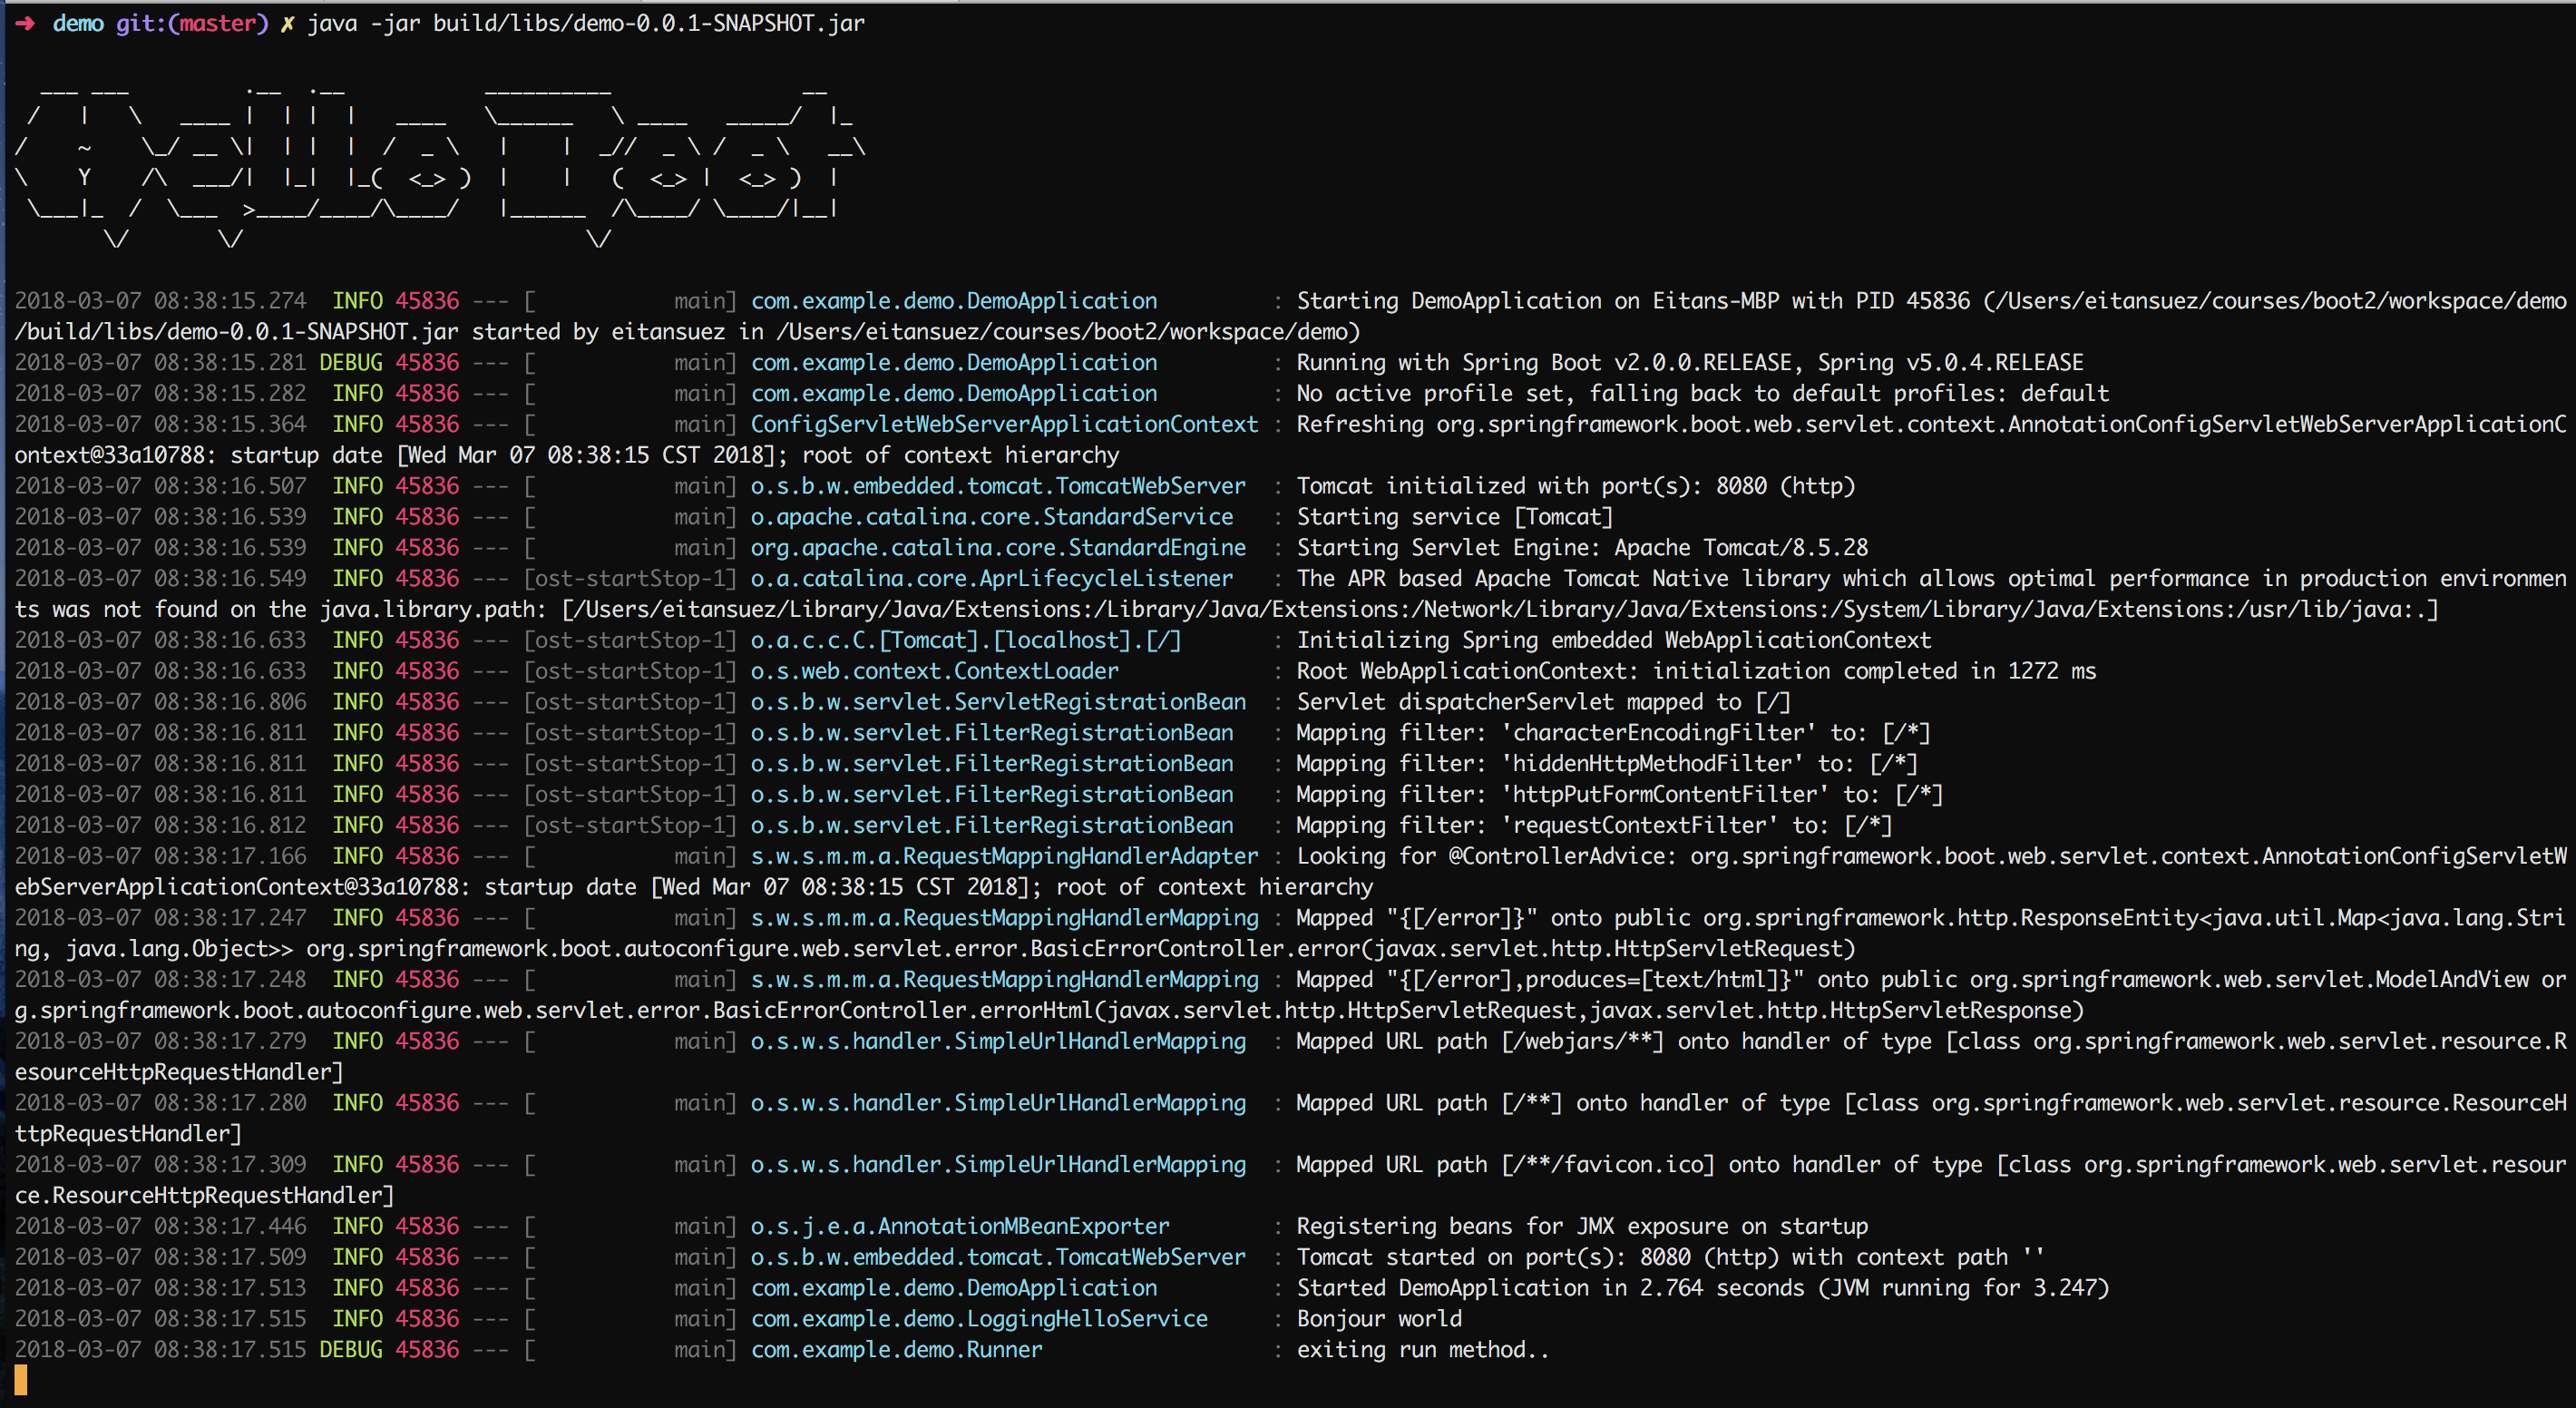
This simple change is all that’s required to turn our application into a web application.
-
Inspect the console output. Note the message Tomcat started on port(s): 8080 (http).
-
Note the "hello world" message: the
CommandLineRunnerwe wrote in the first lab still executes after the application has finished initializing. -
Unlike traditional Java web applications that produce war files that must then be deployed into a Servlet container, Spring Boot produces a runnable jar file with an embedded Tomcat instance (make jar, not war).
-
We didn’t have to configure the Spring MVC Servlet filter, nor did we have to configure a ViewResolver: the configuration of Spring MVC was performed automatically, based on detection of the application’s dependencies. This is a feature that Spring Boot calls AutoConfiguration, which is enabled by virtue of our specification of the
@SpringBootApplicationannotation.
➜ Press Ctrl+C to terminate the running Java process
2. Configuration
Configure the Tomcat server to run on port 8100 instead of the default 8080:
Edit application.yml once more as follows:
@@ -3,5 +3,8 @@ logging:
   level:
     com.example: DEBUG

+server:
+  port: 8100
+
 hello:
   greeting: Bonjour
Re-run the application and verify that Tomcat is now listening on port 8100.
Note how easy it is to configure any aspect of our application with Spring Boot. Also, note how configuration is performed in the same uniform way.
| Setting the server port to 0 will cause Spring Boot to select a random unassigned port on your behalf |
-
Press Ctrl+C to terminate the running Java process
-
Go ahead and undo this change: set the Tomcat port back to its default value of 8080
3. Review dependencies
Run the following command:
➜ gradle dependencies --configuration compile
Observe the output, specifically the transitive dependencies that are added to the classpath by spring-boot-starter-web:
-
spring-boot-starteris automatically included -
spring-boot-starter-jsonsupplies json (and xml) marshalling capabilities which REST controllers require -
spring-boot-starter-tomcatis yet another starter that pulls in the embedded Tomcat libraries -
hibernate-validatorsupplies validation annotations -
spring-webmvcis the default web framework for Spring applications
4. Add a simple REST endpoint
-
In your IDE, create a new class, name it
HelloController -
Use basic Spring MVC annotations to expose a REST endpoint that returns a simple "Hello world" style message, like this:
package com.example.demo;
import org.springframework.web.bind.annotation.GetMapping;
import org.springframework.web.bind.annotation.RestController;
import java.util.HashMap;
import java.util.Map;
@RestController (1)
public class HelloController {
@GetMapping("/hello") (2)
public Map sayHello() {
Map<String, String> map = new HashMap<>();
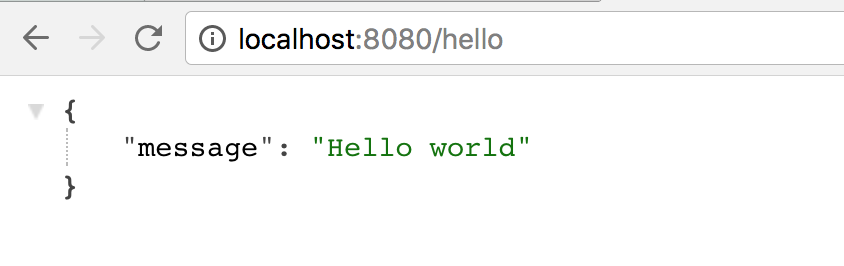
map.put("message", "Hello world");
return map; (3)
}
}| 1 | The @RestController annotation marks this class as a Spring MVC controller that returns a JSON response body |
| 2 | The @GetMapping annotation maps the "/hello" route to this handler method, using the GET http verb |
| 3 | Spring MVC will automatically use the jackson library to marshal the map to a JSON response |
Start the application and visit http://localhost:8080/hello, you should a response similar to this:
5. A second endpoint
Use the Spring MVC @PathVariable to add a second endpoint that echoes a path variable provided in the URL, perhaps something like this:
@@ -1,6 +1,7 @@
 package com.example.demo;

 import org.springframework.web.bind.annotation.GetMapping;
+import org.springframework.web.bind.annotation.PathVariable;
 import org.springframework.web.bind.annotation.RestController;

 import java.util.HashMap;
@@ -16,4 +17,13 @@ public class HelloController {
     return map;
   }

+  @GetMapping("/hello/{who}")
+  public Map sayHello(@PathVariable String who) {
+    Map<String, String> map = new HashMap<>();
+
+    String message = String.format("Hello %s", who);
+    map.put("message", message);
+
+    return map;
+  }
 }
Test this endpoint: visit http://localhost:8080/hello/Jim and verify that the handler properly echoes the name "Jim."
6. Faster feedback with Devtools
Tired yet of stopping and restarting your Java process each time you make a change? Spring Boot offers the dependency spring-boot-devtools, designed to rapidly reload your application whenever any files on the classpath change.
Let’s test this.
6.1. Add the dependency
Add the dependency spring-boot-devtools to the build file. Here’s a diff:
@@ -13,5 +13,7 @@ repositories {

 dependencies {
   compile 'org.springframework.boot:spring-boot-starter-web'
+  compile 'org.springframework.boot:spring-boot-devtools'
+
   testCompile 'org.springframework.boot:spring-boot-starter-test'
 }
Make sure to refresh your IDE’s project configuration to pick up the change.
6.2. Start the app
Next, start the application either from your IDE, or with:
$ gradle bootRun
Notice the debug messages from the devtools library in the console output:
..
DEBUG org.springframework.boot.devtools.settings.DevToolsSettings - Included patterns for restart : []
DEBUG org.springframework.boot.devtools.settings.DevToolsSettings - Excluded patterns for restart : [/spring-boot-starter/target/classes/, /spring-boot-autoconfigure/target/classes/, /spring-boot-starter-[\w-]+/, /spring-boot/target/classes/, /spring-boot-actuator/target/classes/, /spring-boot-devtools/target/classes/]
DEBUG org.springframework.boot.devtools.restart.ChangeableUrls - Matching URLs for reloading : [file:/Users/eitansuez/courses/boot2/workspace/demo/build/classes/java/main/, file:/Users/eitansuez/courses/boot2/workspace/demo/build/resources/main/]
..
Visit the application’s "/hello" endpoint at http://localhost:8080/hello
6.3. Modify the implementation
Make some edit to your controller endpoint’s implementation, perhaps something like this:
@@ -14,6 +14,7 @@ public class HelloController {
   public Map sayHello() {
     Map<String, String> map = new HashMap<>();
     map.put("message", "Hello world");
+    map.put("color", "blue");
     return map;
   }
If you’re using STS, your IDE may automatically re-compile your code. Otherwise, a simple re-compile should do, either from your IDE or using gradle:
$ gradle compileJava
You should see the application’s console output automatically restart the application.
Now, refresh the browser page pointing to the /hello endpoint, and you should see that the change has taken effect.
| Spring Boot also supports live reload. If you install a live reload browser extension, your web page will automatically reload after a change. |
7. Custom Error Pages
-
Start the application
-
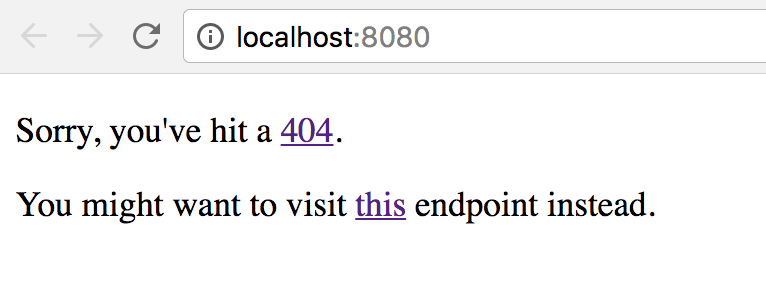
Visit http://localhost:8080/
Since we have no controller handler defined for the route "/", we get 404 response: not found.
Spring Boot makes it easy to customize the HTTP response for such errors, by using conventions.
Just as application.properties is a conventional location for placing configuration properties, Spring Boot defines the static/ folder (in src/main/resources) as a conventional location for placing static resources: html, css, js files etc..
The subfolder error/ is the place to define html pages that are returned as a consequence of a 4xx or other such type error.
-
In
src/main/resourcescreate the subfoldersstatic/error -
In that folder, create an html file named
4xx.html, which will respond to any 400-level error.
Here’s a sample html file:
<!doctype html>
<html lang="en">
<head>
  <meta charset="UTF-8">
  <meta name="viewport"
        content="width=device-width, user-scalable=no, initial-scale=1.0, maximum-scale=1.0, minimum-scale=1.0">
  <meta http-equiv="X-UA-Compatible" content="ie=edge">
  <title>Page Not Found</title>
</head>
<body>

<p>
  Sorry, you've hit a <a href="https://en.wikipedia.org/wiki/HTTP_404" target="_blank">404</a>.
</p>

<p>
  You might want to visit <a href="/hello">this</a> endpoint instead.
</p>

</body>
</html>
After you’ve saved the file, put it to the test:
-
reload the application, and
-
re-visit http://localhost:8080/
Make sure that the response is your custom error page:
8. Template Engines
Spring Boot supports the auto-configuration of a number of popular template engines, including FreeMarker and Thymeleaf.
Let’s set up a simple html template using Thymeleaf: we’ll write up a quick domain object, along with a Controller to populate a view model with a list of such objects for a Thymeleaf template to render.
8.1. Add the dependency
The Spring Boot starters listed here show spring-boot-starter-thymeleaf can be used to build Spring MVC web applications with the Thymeleaf engine.
➜ In build.gradle, add the spring-boot-starter-thymeleaf dependency (and refresh your IDE’s project from its gradle definition):
@@ -12,7 +12,7 @@ repositories {
 }

 dependencies {
   compile 'org.springframework.boot:spring-boot-starter-web'
+  compile 'org.springframework.boot:spring-boot-starter-thymeleaf'
   compile 'org.springframework.boot:spring-boot-devtools'

   testCompile 'org.springframework.boot:spring-boot-starter-test'
8.2. A Todo domain type
For convenience, add the lombok library to the project, to automatically generate getter and setter methods for our data objects.
In build.gradle, add the following to the list of dependencies:
compileOnly 'org.projectlombok:lombok'In IntelliJ, you also need to turn on the setting enable annotation processing.
Write a very simple domain object, perhaps a Todo item, as follows:
package com.example.demo;

import lombok.Builder;
import lombok.Data;

import java.time.LocalDate;

@Builder (2)
@Data (1)
public class Todo {
  private final String title, description;
  private final LocalDate dueDate;
}| 1 | The @Data annotation generates getter and setter methods, a toString(), equals(), and hashCode() methods |
| 2 | The @Builder annotation makes object creation easier to read, by providing a Builder API |
8.3. The template
-
Spring Boot will automatically look for templates in
src/main/resources/templates -
The default suffix for thymeleaf templates is ".html".
➜ Create a file named todos.html, similar to this:
<!DOCTYPE html>
<html xmlns="http://www.w3.org/1999/xhtml"
      xmlns:th="http://www.thymeleaf.org">
<head>
  <title>Todo List</title>
  <meta http-equiv="Content-Type" content="text/html; charset=UTF-8" />
</head>

<body>

<h1>Todo List</h1>

<ol>
  <li th:each="todo : ${todos}">
    <span th:text="${todo.title}">Sample Task</span>:
    <span th:text="${todo.description}">i wonder what i'll do today?</span>
    (<span th:text="${todo.dueDateFormatted}">yyyy-MM-dd</span>)
  </li>
</ol>

</body>
</html>
As soon as we ask ourselves how to display these fields, we realize we have an issue: we need a mechanism to convert our domain object into a view model, giving us an opportunity to perform any needed formatting in the View object.
Write a quick and simple View object:
package com.example.demo;

import lombok.Data;

import java.time.format.DateTimeFormatter;

@Data
public class TodoViewModel {
  private final String title, description;
  private final String dueDateFormatted;

  public TodoViewModel(Todo todo) { (1)
    this.title = todo.getTitle();
    this.description = todo.getDescription();
    this.dueDateFormatted = todo.getDueDate().format(DateTimeFormatter.ISO_DATE);
  }
}| 1 | We create a constructor here that makes it easy to construct a TodoViewModel from a Todo object |
8.4. The Controller
Finally, let’s create a controller that will expose a /todos endpoint for fetching a task list.
Its main responsibility will be to:
-
start with a List of
Todoobjects -
transform the list into a list of
TodoViewModelobjects -
bind the list as a model attribute that will be provided by Spring to our template
-
return the name of the template that will be used to render the html page
package com.example.demo;

import org.springframework.stereotype.Controller;
import org.springframework.ui.Model;
import org.springframework.web.bind.annotation.GetMapping;

import java.time.LocalDate;
import java.time.temporal.ChronoUnit;
import java.util.ArrayList;
import java.util.List;
import java.util.stream.Collectors;

@Controller
public class TodoController {

  private final List<Todo> todoList = new ArrayList<>();

  public TodoController() {
    // hard-code the list for now:

    LocalDate nextWeek = LocalDate.now().plus(7, ChronoUnit.DAYS);

    todoList.add(Todo.builder()
        .title("Shop")
        .description("Go shopping ahead of trip")
        .dueDate(nextWeek).build());
    todoList.add(Todo.builder()
        .title("Pack")
        .description("Be sure to pack your things")
        .dueDate(nextWeek).build());
    todoList.add(Todo.builder()
        .title("Drive")
        .description("Drive to the airport")
        .dueDate(nextWeek).build());
    todoList.add(Todo.builder()
        .title("Fly")
        .description("Fly to some mysterious destination")
        .dueDate(nextWeek).build());
  }

  @GetMapping("/todos")
  public String fetchTodos(Model model) {

    List<TodoViewModel> todoViews = todoList
        .stream()
        .map(TodoViewModel::new)
        .collect(Collectors.toList());

    model.addAttribute("todos", todoViews);

    return "todos"; // the name of the template to render
  }
}
Time to test your solution:
-
Fire up the application
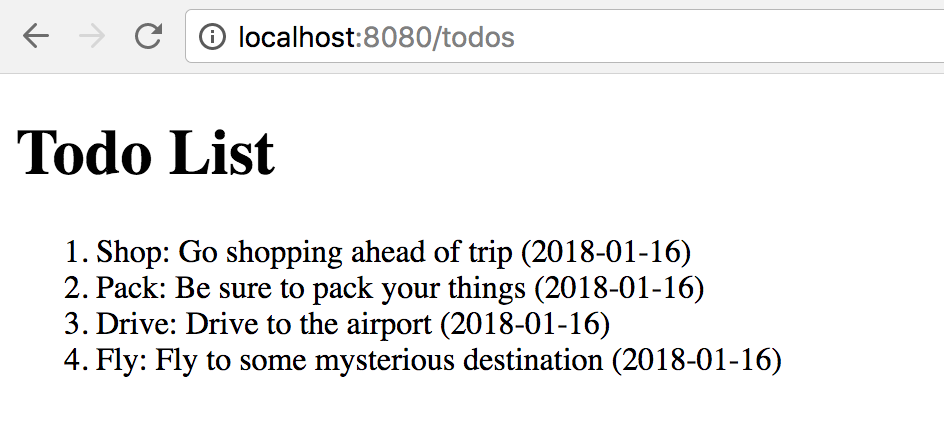
-
In a browser, visit http://localhost:8080/todos
You should see a response that resembles this:
9. Deviating from the defaults
9.1. Using a different Servlet container
Spring Boot makes it easy to replace Tomcat with another Servlet container. Out of the box, it supports Tomcat, Jetty, and Undertow.
To replace the Servlet container:
-
Exclude
spring-boot-starter-tomcatfrom the classpath -
Add a different starter
@@ -11,8 +11,14 @@ repositories {
   mavenCentral()
 }

+configurations {
+  compile.exclude module: "spring-boot-starter-tomcat"
+}
+
 dependencies {
   compile 'org.springframework.boot:spring-boot-starter-web'
   compile 'org.springframework.boot:spring-boot-starter-thymeleaf'
+  compile 'org.springframework.boot:spring-boot-starter-undertow'
+
   compile 'org.springframework.boot:spring-boot-devtools'

   compileOnly 'org.projectlombok:lombok'
And that’s it!
Run the application, and note how the console output now states: Undertow started on port(s) 8080 (http)
➜ Go ahead and undo this change: switch back to Tomcat.
9.2. Producing a .war file instead of the default .jar
With gradle, to switch to packaging the application as a .war file:
-
Apply the war plugin to the build file, and
-
Mark
spring-boot-starter-tomcatas a library provided by the runtime
Here’s a diff showing this change:
@@ -1,6 +1,6 @@
 plugins {
-  id 'java'
+  id 'war'
   id 'org.springframework.boot' version '2.0.3.RELEASE'
   id 'io.spring.dependency-management' version '1.0.6.RELEASE'
 }

 group = 'com.example'
@@ -17,5 +17,7 @@ dependencies {

   compileOnly 'org.projectlombok:lombok'

+  providedRuntime 'org.springframework.boot:spring-boot-starter-tomcat'
+
   testCompile 'org.springframework.boot:spring-boot-starter-test'
 }
Now, rebuild the project:
$ gradle clean build
Next, inspect the generated artifact:
➜  ls -lF build/libs
total 34184
-rw-r--r--  1 eitansuez  staff  17500593 Mar  7 09:29 demo-0.0.1-SNAPSHOT.war
We now have a war file!
What’s interesting about this war file is that it gives us the best of both worlds:
-
The embedded Tomcat library is still bundled with the artifact, meaning that we can still run it with a simple "java -jar" command
-
The embedded Tomcat library is placed outside of the classpath: when the war file is running in a Servlet container, there’s no conflict
Verify this. Look inside the war file:
.
├── META-INF
│   └── MANIFEST.MF
├── WEB-INF
│   ├── classes
│   │   ├── ...
│   ├── lib
│   │   ├── ...
│   └── lib-provided
│       ├── javax.annotation-api-1.3.2.jar
│       ├── spring-boot-starter-tomcat-2.0.3.RELEASE.jar
│       ├── tomcat-embed-core-8.5.31.jar
│       ├── tomcat-embed-el-8.5.31.jar
│       └── tomcat-embed-websocket-8.5.31.jar
└── org
    └── springframework
        └── boot
            └── loader
                ├── ...
Note how the embedded Tomcat jar files are located in a separate folder named 'lib-provided'.
Inspect the manifest file:
Manifest-Version: 1.0
Start-Class: com.example.demo.DemoApplication
Main-Class: org.springframework.boot.loader.WarLauncher
Note how the main class is no longer the JarLauncher; it’s now a class named WarLauncher.
➜ Go ahead and undo this customization: switch back to building jar files.
10. Summary
The theme for this lab was the construction of web applications with Spring Boot.
These topics were covered:
-
Building a web app with Boot
-
Configuring the server port
-
Building REST endpoints
-
Using devtools to rapidly and automatically refresh the application on a change
-
Customizing error pages
-
Working with template engines
-
Customizing the Servlet container (switching from Tomcat to Jetty or Undertow)
-
Switching from jar to war packaging
Through conventions, starters, and auto-configuration, Spring Boot makes it a pleasure to write web applications.