1. What You Will Learn
-
Gain basic familiarity with Pivotal Cloud Foundry and its Apps Manager
-
How to deploy a spring boot application to cloud foundry
-
How to create a backing database service
-
How to bind an application to a backing database service
-
Basic cf commands such for viewing logs, application status, and scaling
2. Pivotal Cloud Foundry
In this lab, we will learn to deploy our application to Pivotal Cloud Foundry (PCF). We will use a public instance of PCF named Pivotal Web Services.
Point your web browser to this link: http://run.pivotal.io/, and click on the big green Sign up for free button, and create a free-trial account.
After the account is created (which involves entering a code sent to you via SMS), you will be prompted to create an org, which is a kind of workspace.
3. PCF Apps Manager
You have just logged in to the Apps Manager: a graphical user interface that allows you to navigate your cloud foundry workspace.
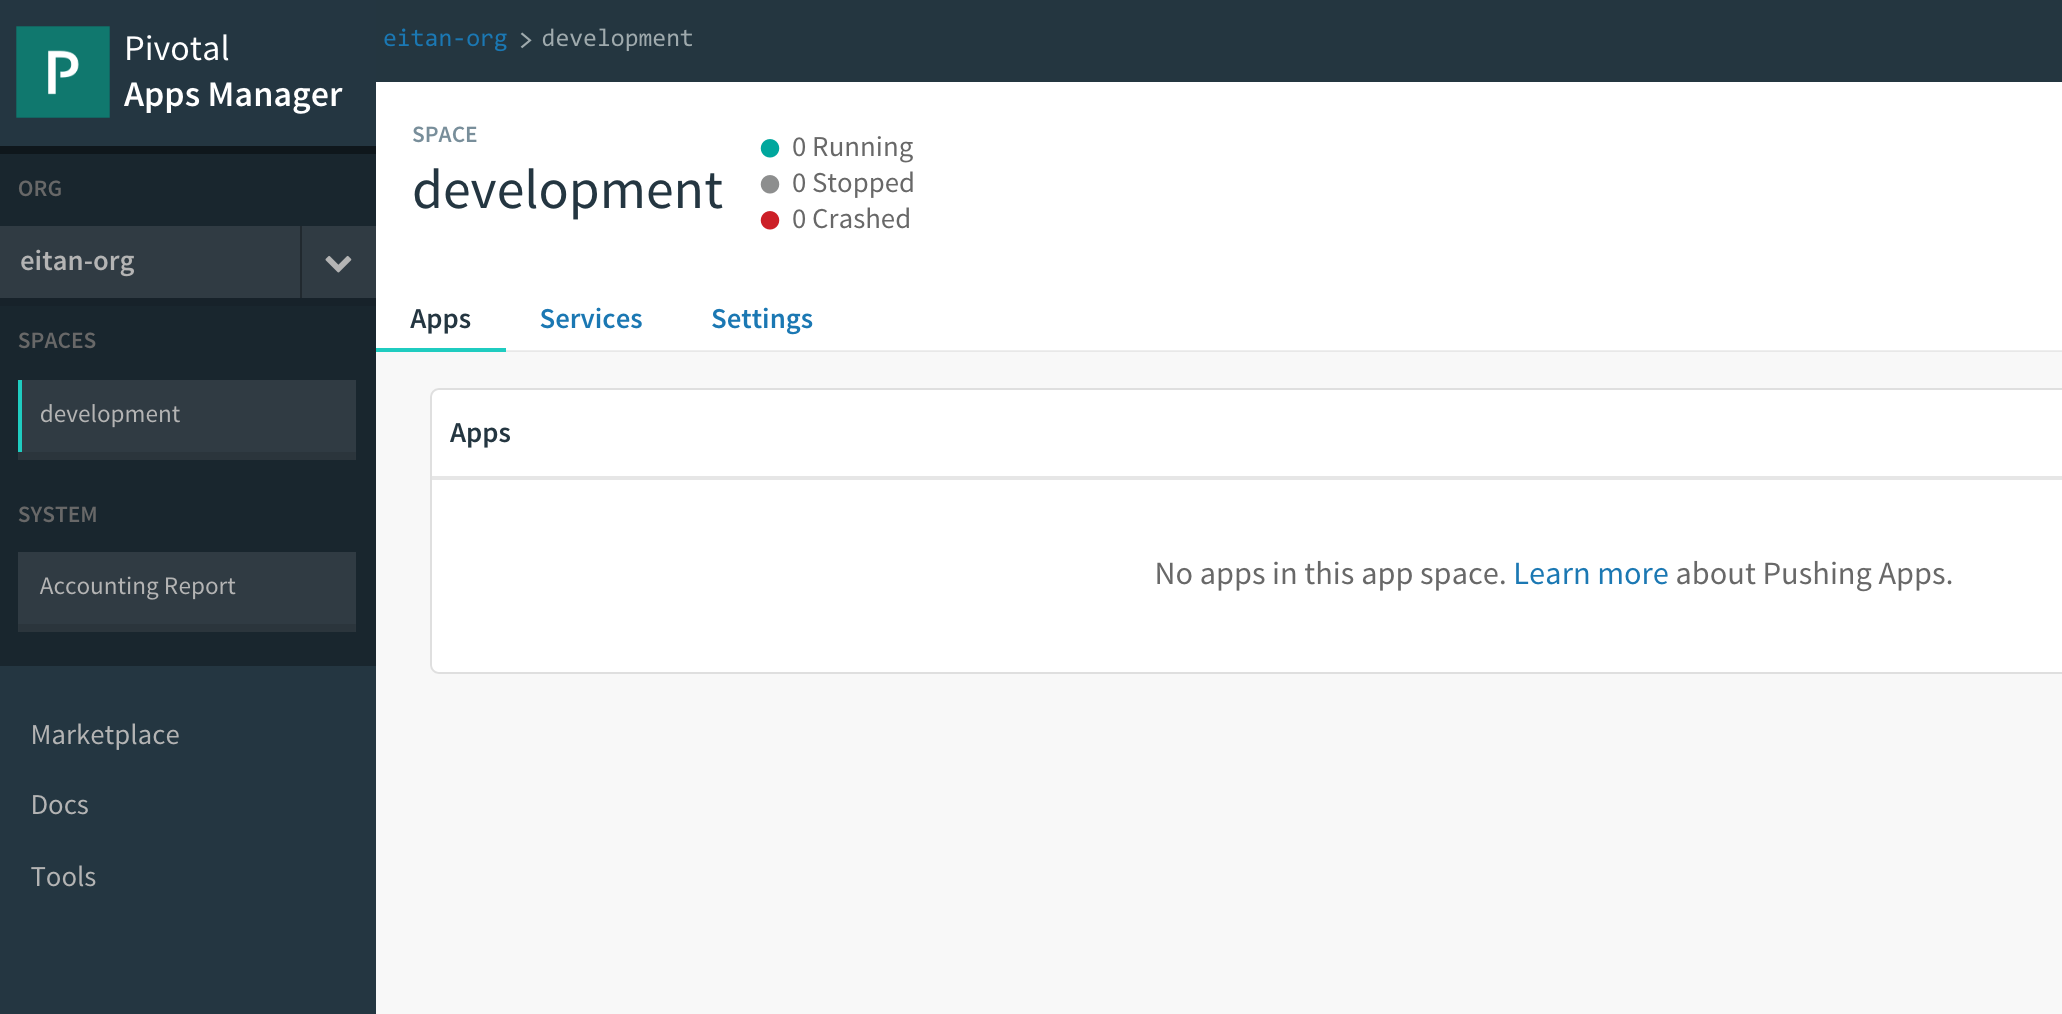
Note the organization and space hierarchy that will be your work area. At the moment we have no applications deployed to our space.
4. CF CLI
In order to deploy an application, we’ll need the cloud foundry command line client, or cf-cli.
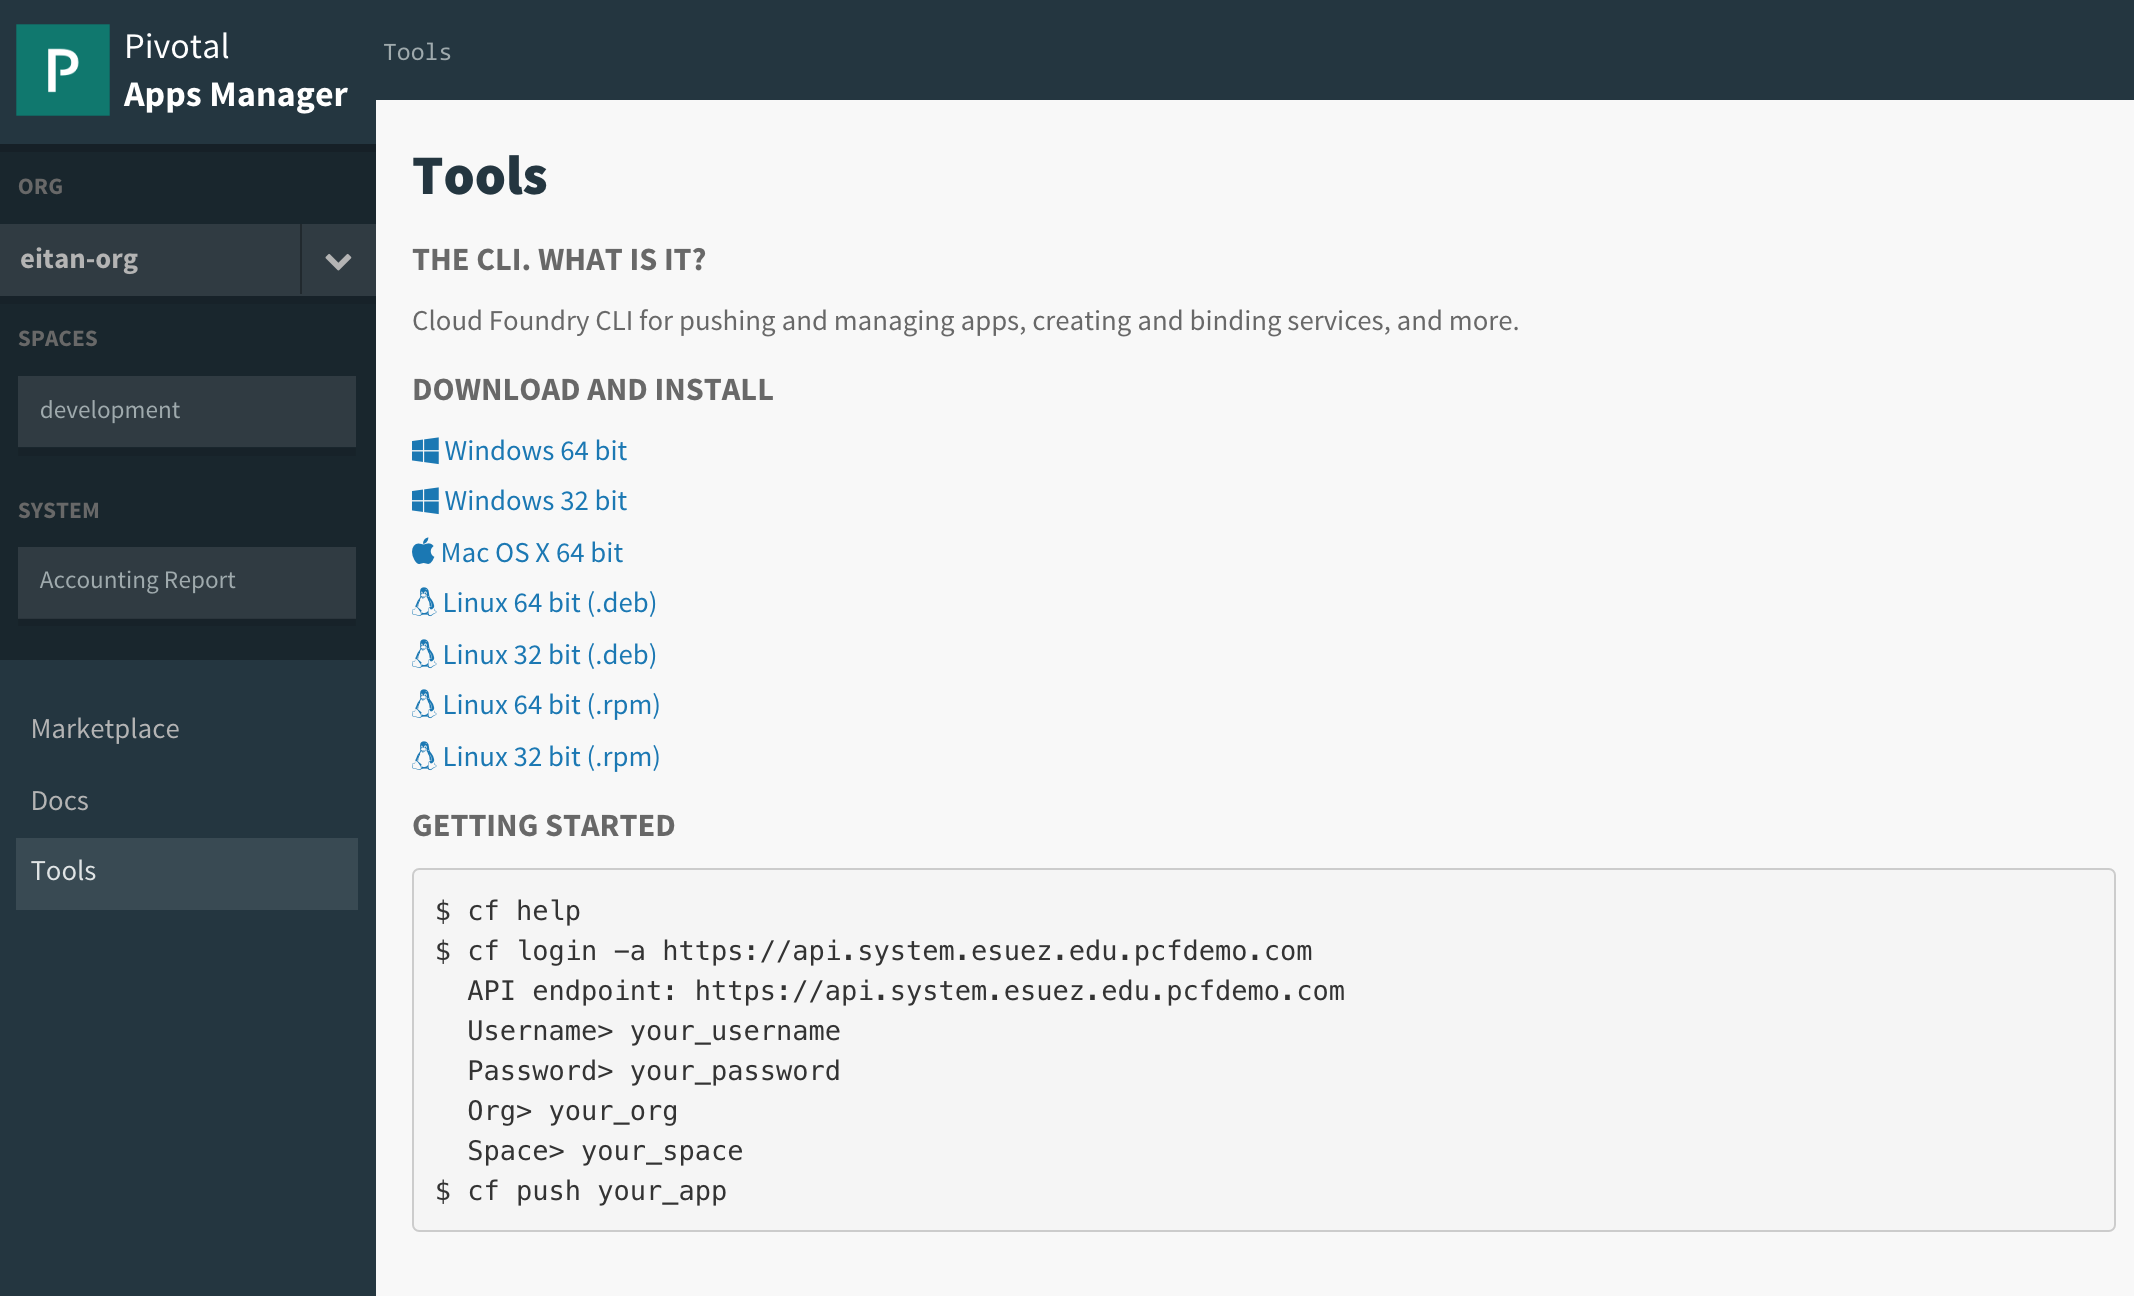
Click on the Tools link at the bottom of the navigation bar on the left hand side of your apps manager:
-
Download and install the CLI client that corresponds to your operating system.
If you are on a Mac and using homebrew, you can install the cloudfoundry cli with these commands:
$ brew tap cloudfoundry/tap
$ brew install cf-cli
Verify proper installation with the following command:
cf version-
which should output something similar to:
cf version 6.20.0+25b1961-2016-06-29 -
-
log in the Pivotal Cloud Foundry environment.
cf login -a api.run.pivotal.ioYou will be prompted for your username and password (the same credentials used to log in to the apps manager).
-
After logging in, the
cf apiandcf targetcommands are useful to recall what PCF instance our client is targeting. Try out these commands and observe the output. -
Get your bearings: you will be starting out in a space with no deployed applications. Invoke the command:
cf appsThe output will echo the name of the space we’re currently in, and validate that we have no apps defined in that space:
Getting apps in org eitan-org / space development as eitan...
OK

No apps found
5. Deploy to PCF
Let’s now pick up where we left off in the previous lab: with our hello-spring-boot-rest application. We can run it locally. Let’s learn how to deploy and run this application in cloud foundry.
The command to deploy an application in cloud foundry is cf push.
-
Review the documentation for the
cf pushcommand:cf help pushThe output should begin with text that looks like the following:
NAME: push - Push a new app or sync changes to an existing app USAGE: Push a single app (with or without a manifest): ... -
The relevant options are as follows:
-
The name our application will be identified by. This name must be unique within a space. A suitable name in our case is
hello-spring-boot-rest, but feel free to give it a different name. -
-p: The path to the build artifact that we wish to deploy: our jar file -
-m: How much memory do we wish to allocate for our application (768M should do) -
--random-route: this flag ensures that our app will have a unique url, or route
-
-
Putting it all together, to deploy our
hello-spring-boot-restapplication, we’ll first generate our artifact:mvn clean packageand next:
cf push hello-spring-boot-rest -p target/hello-spring-boot-rest-0.0.1-SNAPSHOT.jar -m 768M --random-route -
Observe the console output, and see if you can follow the steps that the
cf pushcommand takes to deploy your application to cloud foundry. The deployment process takes approximately a minute, as the cli will upload your jar file, stage your application, and finally start up the application in a container.The
hello-spring-boot-restapplication will be deployed to a random URI in our Pivotal Cloud Foundry environment. Our application will also be listed in the apps manager in our space: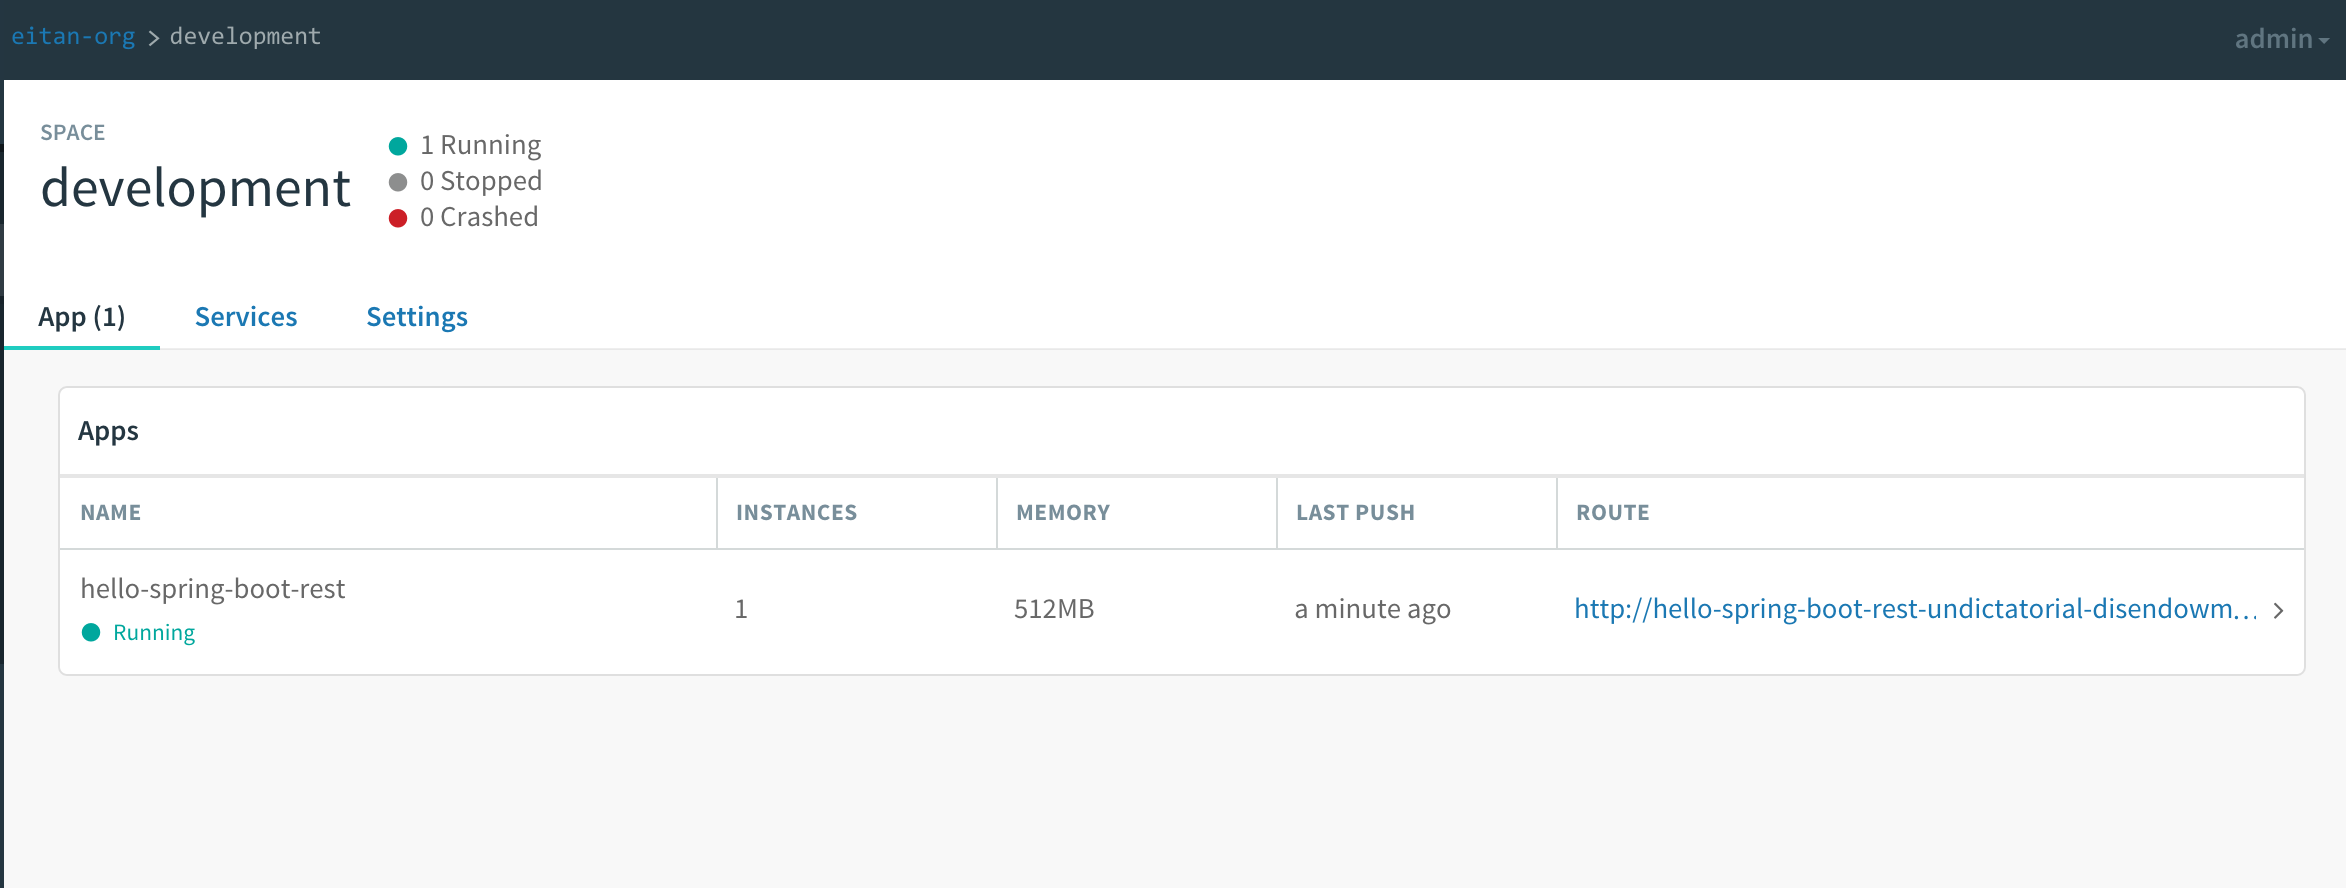
The apps manager makes it easy to navigate to our running application by providing a link to its route.
-
Browse to the
hello-spring-boot-rest/greetingsendpoint to verify that thehello-spring-boot-restapplication is working. Thehello-spring-boot-restapplication works the same as it did locally. At this point it is still using an embedded database.
6. The CF marketplace
We know that we don’t want to use our embedded database.
PCF can be used to provision a database for our application, through a feature called managed services. PCF administrators configure a PCF instance with a variety of managed services. Once installed, these services can be viewed in the marketplace.
Click on the Marketplace link in the apps manager navigation bar:
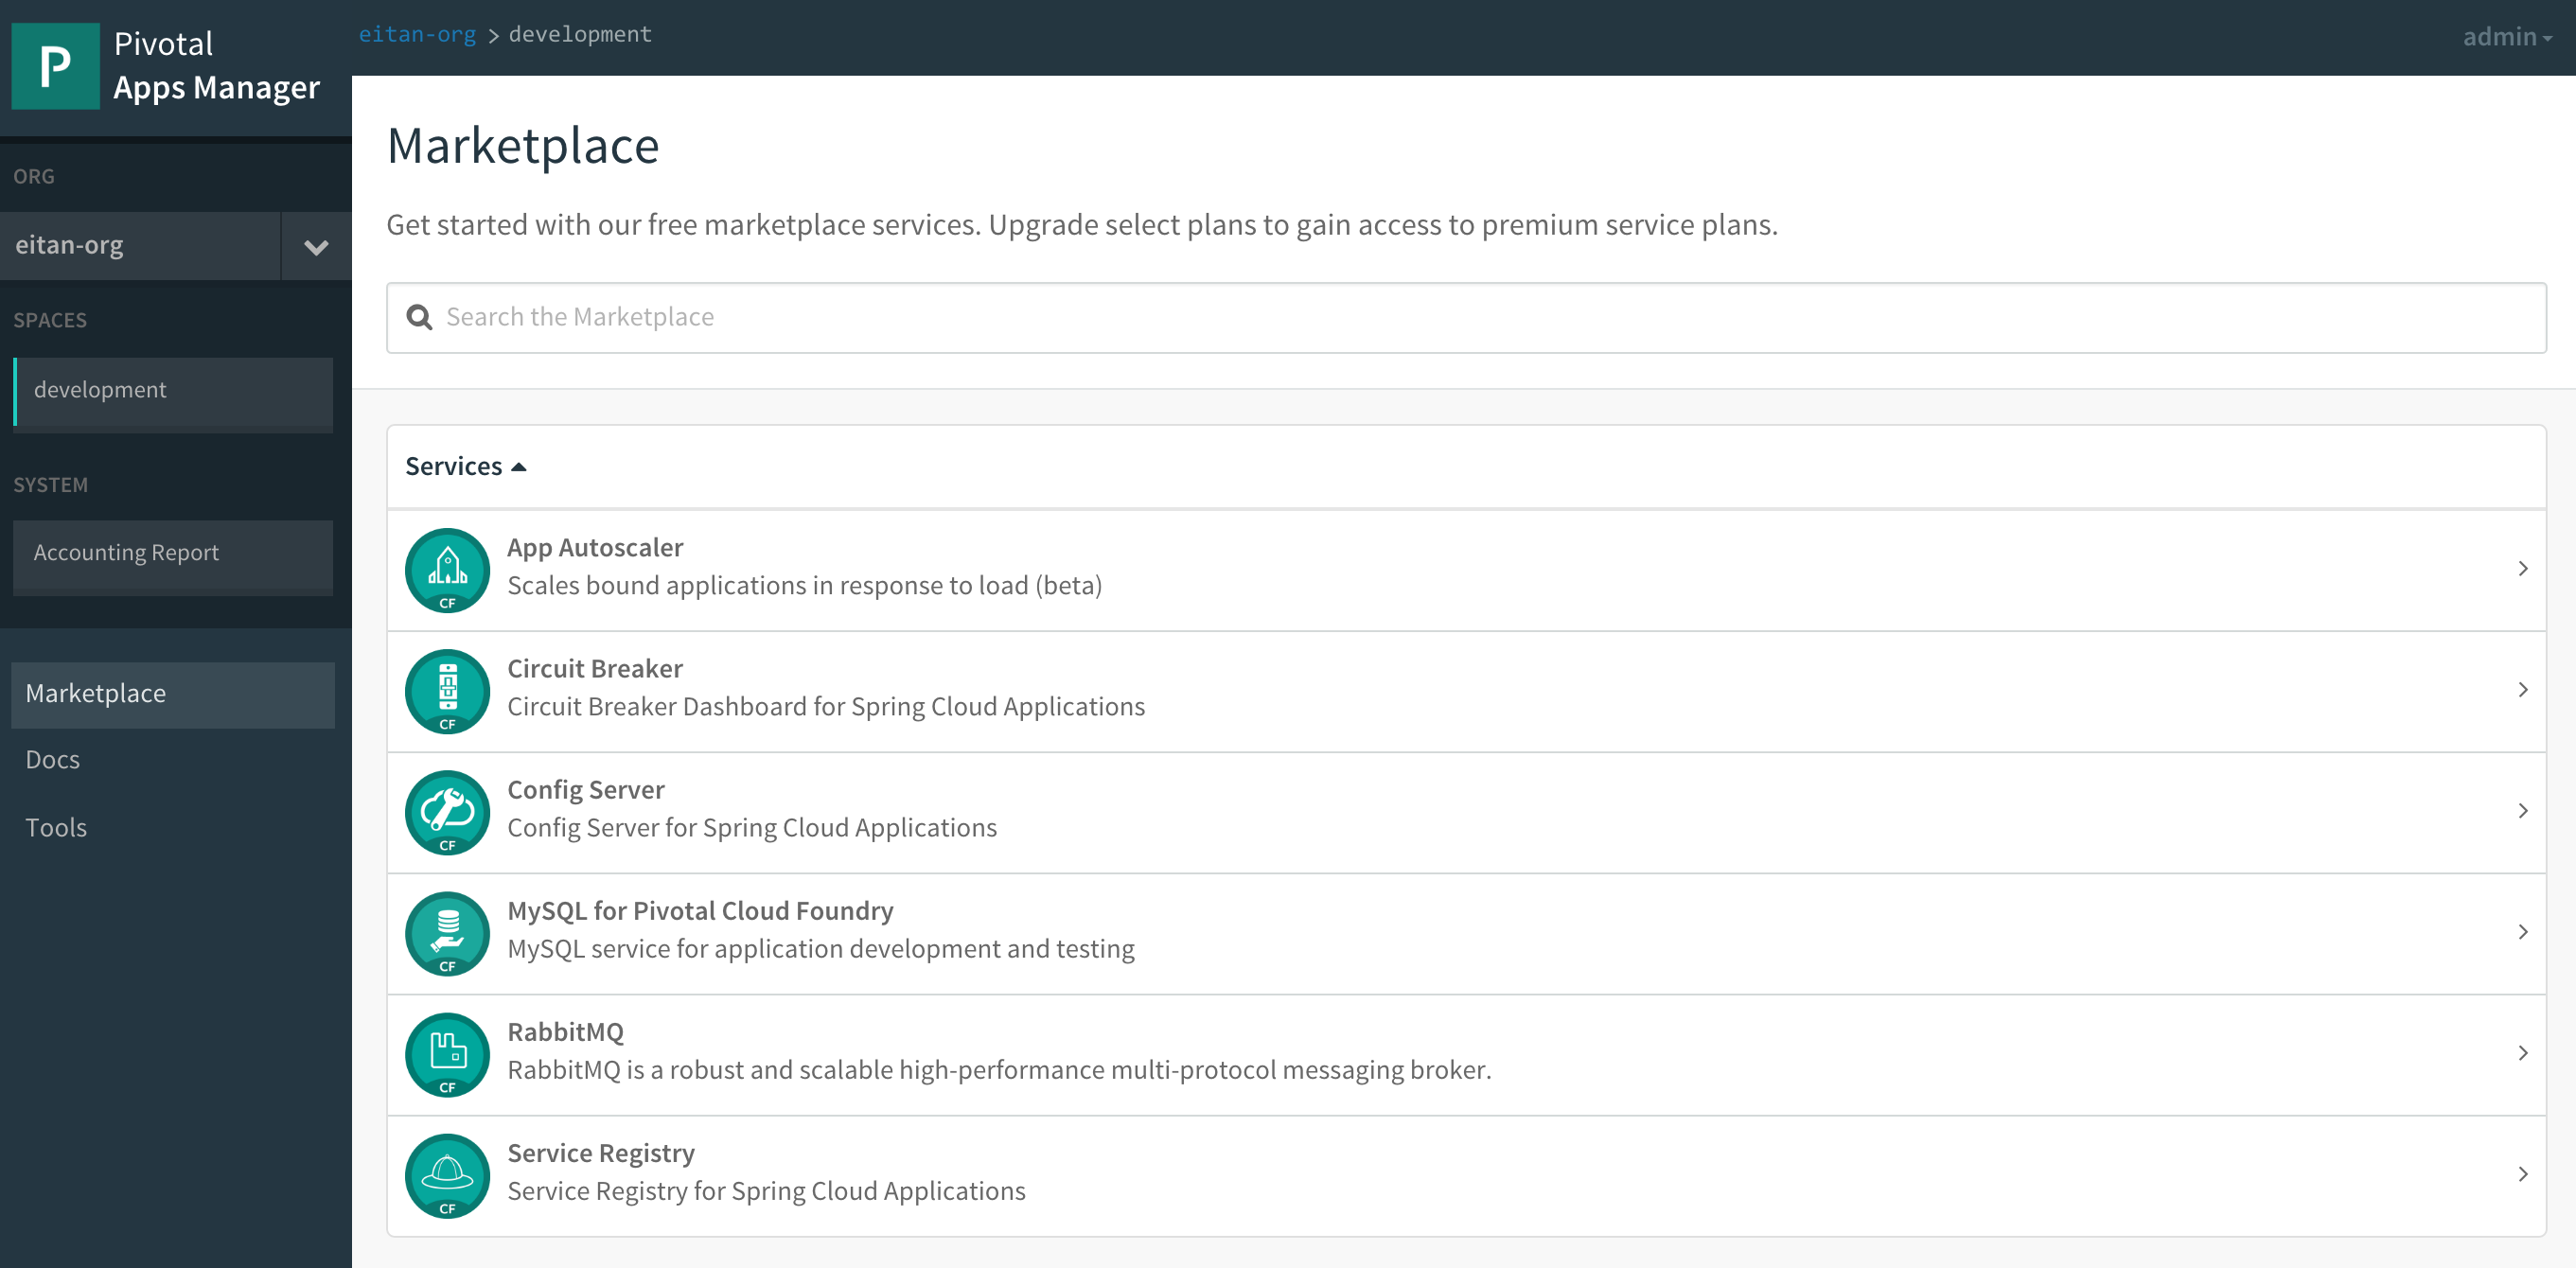
We will be using the MySQL managed service.
Note that the list of managed services can also be obtained via the cli with:
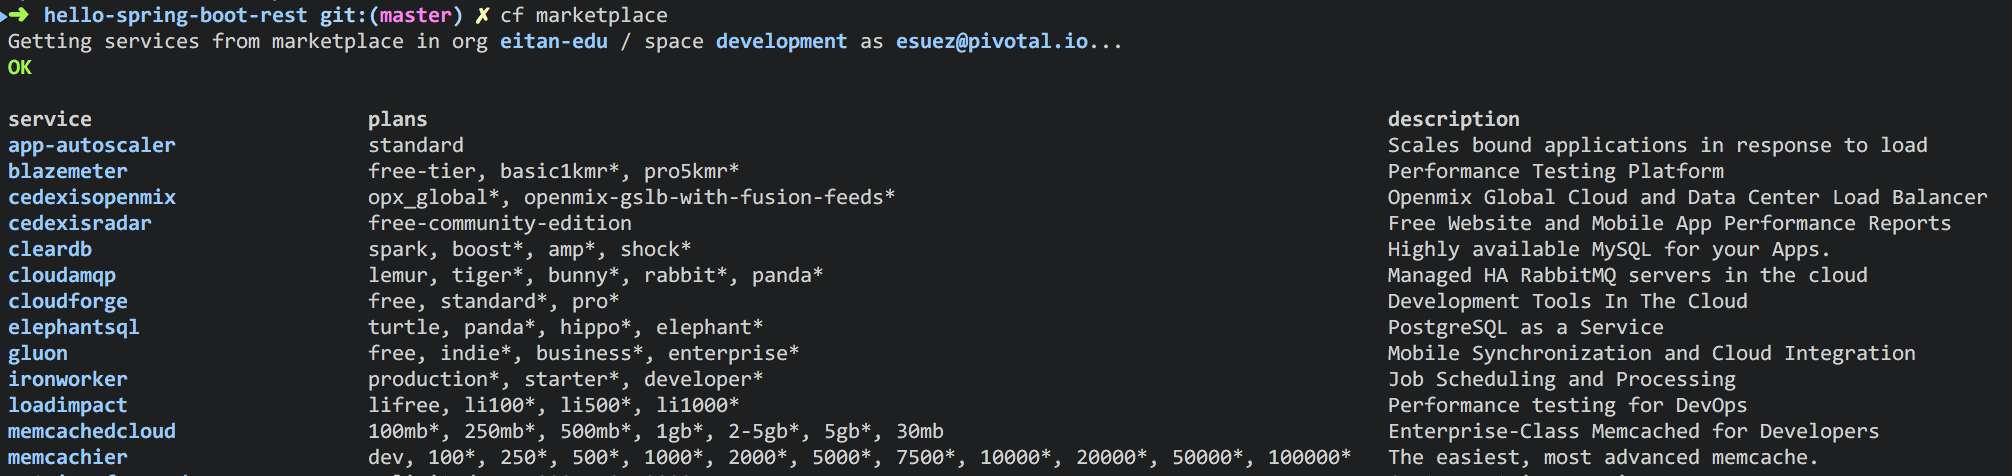
7. Provisioning a MySQL database
With cloud foundry, provisioning a MySQL database is as simple as invoking the following command:
cf create-service cleardb spark greetings-db
Creating service instance greetings-db in org eitan-org / space development as eitan...
OK
The cf services command can be used to list the services that have been provisioned:
cf services
Getting services in org eitan-org / space development as eitan...
OK

name           service   plan        bound apps   last operation
greetings-db   cleardb   spark                    create succeeded
8. Switching from In-Memory DB to MySQL
In order to switch from hsql to MySQL, we must:
-
ensure that we package the mysql jdbc driver with our application
-
bind our application to the backing database service we just provisioned
-
Review the following file:
hello-spring-boot-rest/pom.xml. By adding themysql-connector-javadependency, we have added runtime MySQL support for thehello-spring-boot-restapplication.<dependency> <groupId>mysql</groupId> <artifactId>mysql-connector-java</artifactId> <scope>runtime</scope> </dependency>Since this dependency existed in the
pom.xmlfile already, we do not need to repackage and redeploy its jar file. -
Let’s bind our application to our database service:
cf bind-service hello-spring-boot-rest greetings-db
Binding service greetings-db to app hello-spring-boot-rest in org eitan-org / space development as eitan...
OK
TIP: Use 'cf restage hello-spring-boot-rest' to ensure your env variable changes take effect
Ignore the above tip for now.
Invoking
cf servicesonce more will validate that our application is indeed bound togreetings-db:cf services Getting services in org eitan-org / space development as eitan... OK name service plan bound apps last operation greetings-db cleardb spark hello-spring-boot-rest create succeededThis binding process exposes configuration to our application via an environment variable, named VCAP_SERVICES. If we inspect the environment variables associated with our application, we will notice that the application now has a means to look up the jdbc url and access credentials via this environment variable:
cf env hello-spring-boot-rest Getting env variables for app hello-spring-boot-rest in org eitan-org / space development as admin... OK System-Provided: { "VCAP_SERVICES": { "cleardb": [ { "credentials": { "hostname": "10.0.16.64", "jdbcUrl": "jdbc:mysql://10.0.16.64:3306/cf_5fb1a1e6_3a35_4813_9f0e_c7a74ed70e84?user=YtUKdyagn0nqWPYP\u0026password=1PlnGL2jNktUjcex", "name": "cf_5fb1a1e6_3a35_4813_9f0e_c7a74ed70e84", "password": "1PlnGL2jNktUjcex", "port": 3306, "uri": "mysql://YtUKdyagn0nqWPYP:1PlnGL2jNktUjcex@10.0.16.64:3306/cf_5fb1a1e6_3a35_4813_9f0e_c7a74ed70e84?reconnect=true", "username": "YtUKdyagn0nqWPYP" }, "label": "cleardb", "name": "greetings-db", "plan": "spark", "provider": null, "syslog_drain_url": null, "tags": [ "mysql", "relational" ] } ] } } ... -
All that remains is to restart our application to allow this environment variable to be applied with our running application.
cf restart hello-spring-boot-restInspecting the logs for our application as it’s restarting is revealing. We should be able to see validation from spring that it’s configuring a jdbc datasource using a mysql:// scheme, and from our O/R Mapper that it’s using a MySQL dialect and that it’s auto-generating our database schema:
cf logs hello-spring-boot-rest
Connected, tailing logs for app hello-spring-boot-rest in org eitan-org / space development as eitan...
...
2016-07-26T17:04:29.44-0500 [APP/0]      OUT 2016-07-26 22:04:29.439  INFO 21 --- [           main] urceCloudServiceBeanFactoryPostProcessor : Reconfigured bean dataSource into singleton service connector org.apache.tomcat.jdbc.pool.DataSource@775b5d7{ConnectionPool[defaultAutoCommit=null; defaultReadOnly=null; defaultTransactionIsolation=-1; defaultCatalog=null; driverClassName=com.mysql.jdbc.Driver; maxActive=4; maxIdle=100; minIdle=0; initialSize=0; maxWait=30000; testOnBorrow=true; testOnReturn=false; timeBetweenEvictionRunsMillis=5000; numTestsPerEvictionRun=0; minEvictableIdleTimeMillis=60000; testWhileIdle=false; testOnConnect=false; password=********; url=jdbc:mysql://10.0.16.64:3306/cf_5fb1a1e6_3a35_4813_9f0e_c7a74ed70e84?user=YtUKdyagn0nqWPYP&password=1PlnGL2jNktUjcex; username=null; validationQuery=/* ping */ SELECT 1; validationQueryTimeout=-1; validatorClassName=null; validationInterval=30000; accessToUnderlyingConnectionAllowed=true; removeAbandoned=false; removeAbandonedTimeout=60; logAbandoned=false; connectionProperties=null; initSQL=null; jdbcInterceptors=null; jmxEnabled=true; fairQueue=true; useEquals=true; abandonWhenPercentageFull=0; maxAge=0; useLock=false; dataSource=null; dataSourceJNDI=null; suspectTimeout=0; alternateUsernameAllowed=false; commitOnReturn=false; rollbackOnReturn=false; useDisposableConnectionFacade=true; logValidationErrors=false; propagateInterruptState=false; ignoreExceptionOnPreLoad=false; }
...
2016-07-26T17:04:32.12-0500 [APP/0]      OUT 2016-07-26 22:04:32.125  INFO 21 --- [ost-startStop-1] org.hibernate.Version                    : HHH000412: Hibernate Core {4.3.10.Final}
...
2016-07-26T17:04:32.74-0500 [APP/0]      OUT 2016-07-26 22:04:32.742  INFO 21 --- [ost-startStop-1] org.hibernate.dialect.Dialect            : HHH000400: Using dialect: org.hibernate.dialect.MySQLDialect
...
2016-07-26T17:04:33.17-0500 [APP/0]      OUT 2016-07-26 22:04:33.175  INFO 21 --- [ost-startStop-1] org.hibernate.tool.hbm2ddl.SchemaUpdate  : HHH000228: Running hbm2ddl schema update
...
2016-07-26T17:04:33.20-0500 [APP/0]      OUT 2016-07-26 22:04:33.208  INFO 21 --- [ost-startStop-1] org.hibernate.tool.hbm2ddl.SchemaUpdate  : HHH000232: Schema update complete