The starting point for our exploration of Spring Cloud is a sample application, named greeting, that is by design kept very simple.
1. Meet the Greeting application
greeting is a Spring Boot application.
Inspect the project’s build file, build.gradle. The main compile dependencies are the Spring Boot starter dependencies: web, actuator, and freemarker (a template library).
Take the time to review the source code. Let’s quickly catalog what we’ve got.
In terms of source code, there’s:
-
the Spring Boot application class:
GreetingApplication -
a controller class named
GreetingController -
a Spring ConfigurationProperties class named
GreetingPropertiesfor configuring the behavior of our controller -
a service-type Spring bean named
FortuneService
In terms of application resources, we have:
-
the Spring Boot application configuration properties file, in yml format:
application.yml -
an html template, used in conjunction with the
GreetingController -
some static resources: css and javascript files used primarily for the purpose of styling the view
2. Launch the App
Launch the greeting application:
$ ./gradlew bootRun-
Visit http://localhost:8080, and verify that the greeting page comes up.
-
Review the controller logic: it conditionally displays a fortune, depending on whether the configuration property
greeting.displayFortuneis set to true. This configuration property appears to not be set at the moment (the page should not be displaying any fortunes, just a greeting message). -
To verify this, let’s explore one of the Spring Boot actuator endpoints: visit http://localhost:8080/env. What happens? Spring Boot actuator endpoints require authentication by default. Since we don’t have Spring Security configured for this project (yet anyways), we cannot access these endpoints without disabling security.
3. Turn off management endpoints security
-
If necessary, consult the Spring reference documentation to learn how to allow access to your application’s management endpoints without authentication.
-
Edit the
application.ymlfile once more: add an entry to disable security for the Spring Boot actuator management endpoints -
Restart your application, and verify that you can visit the http://localhost:8080/env endpoint. Take some time to review the information returned by this endpoint. At this point, we’re mostly interested in having a convenient way to verify the application’s configuration.
-
Note that the json response contains an
applicationConfigsection. Verify thatgreeting.displayFortuneis not set.
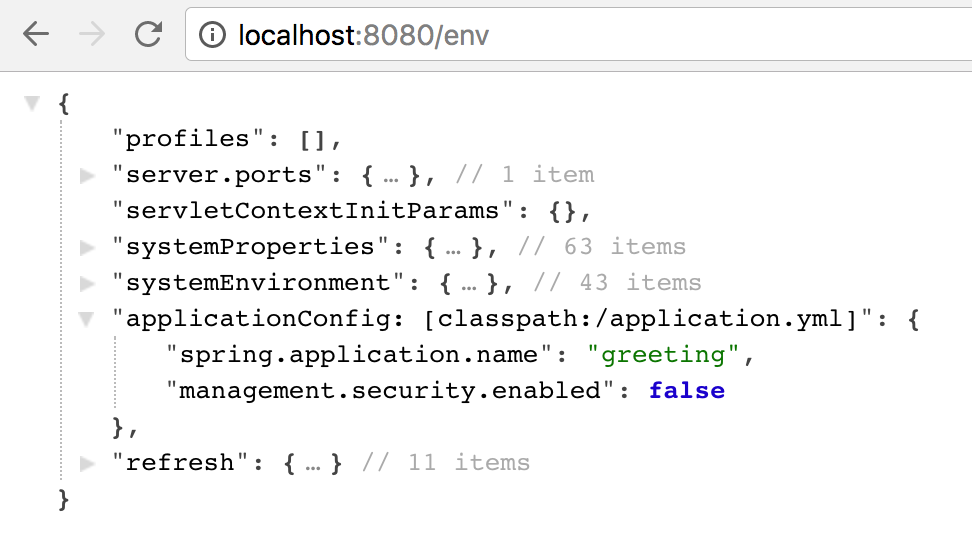
|
Pretty-printing JSON in your web browser
If your web browser does not display the json response neatly as shown above, then take a minute to add an extension to your browser for this. One option for the Chrome web browser is https://github.com/callumlocke/json-formatter. |
4. Turn on greeting.displayFortune
-
Edit
application.ymland explicitly set thegreeting.displayFortuneproperty to true -
Restart the application
-
Re-visit the actuator 'env' endpoint and verify that
greeting.displayFortuneis now set -
Visit the application’s main page, and verify that a fortune now displays on the page
-
Refresh the application’s main page and verify that it randomly displays a different fortune
5. Review and Run Unit Tests
By now, we understand what this application does: it has a single controller that renders a greeting, and optionally a fortune. Furnishing fortunes is the domain of the fortune service. The expectations of the behavior of these two components are automated as unit tests.
Take a moment to review the unit test for the fortune service. The service has a single test, that basically asserts that when we invoke getFortune() we get back a non-blank String.
The controller’s unit test is perhaps slightly more complicated by the fact that the GreetingController has two collaborators: the configuration object, and the fortune service. Here the unit tests use the popular mockito mocking framework to mock these delegates so that it can focus on verifying the behavior of the controller method getGreeting() under different circumstances: when greeting.displayFortune is set, and when it’s not set.
These tests are purely unit tests and do not make use of Spring’s support for integration testing, which subsequent labs will touch on.
⇒ Run these unit tests and verify that they pass. You should be able to do this either from your IDE or from the command line:
$ ./gradlew testGradle generates html test reports in build/test-reports/tests/test/index.html.
6. Congratulations
We’ve completed this first lab and we’re now familiar with the application under test.
Next up, let’s talk about breaking up the monolith.