Estimated Time: 25 minutes
1. Preface
There’s something special about setting up the automation to produce a new build artifact for an application as soon as a commit is made to version control, and then automatically deploying that application to cloudfoundry. In this lab, you’ll do precisely that. You’re going to use the Jenkins CI tool for the build job, and CloudFoundry as your target deployment platform.
2. Exercises
2.1. What is Continuous Delivery?
For a brief explanation, click here.
2.2. Setup Github Repository
-
Locate the
Articulateproject on GitHub -
Use the
Forkbutton to make your own private copy of the project in your own GitHub account.
2.3. Install Jenkins
Install Jenkins on your local machine or use AWS Jenkins AMI.
2.3.1. Local Installation
-
Prior to installing Jenkins the following should be installed:
-
Download
Jenkinsversion 1.642.4 war file. Copy the file to folder:~/pivotal-cloud-foundry-developer-workshop/jenkins/(~is shorthand for the home directory in Linux, Mac and Unix based operating systems). You will need to create this directory in your home directory. -
Change the working directory to where you copied the
jenkins.warfile.cd ~/pivotal-cloud-foundry-developer-workshop/jenkins/ -
Run Jenkins.
java -jar jenkins.war -
Open a browser to http://localhost:8080.
2.3.2. AWS Jenkins AMI
Provision a Jenkins instance on AWS.
2.4. Configure Jenkins
You may skip this section if using the AWS Jenkins AMI.
-
Click on the
Manage Jenkinslink, then click theManage Pluginslink.
-
Click on the
Availabletab, and find the GitHub plugin. (You can search using the Filter box in the top right corner.) Select it and clickInstall without restart.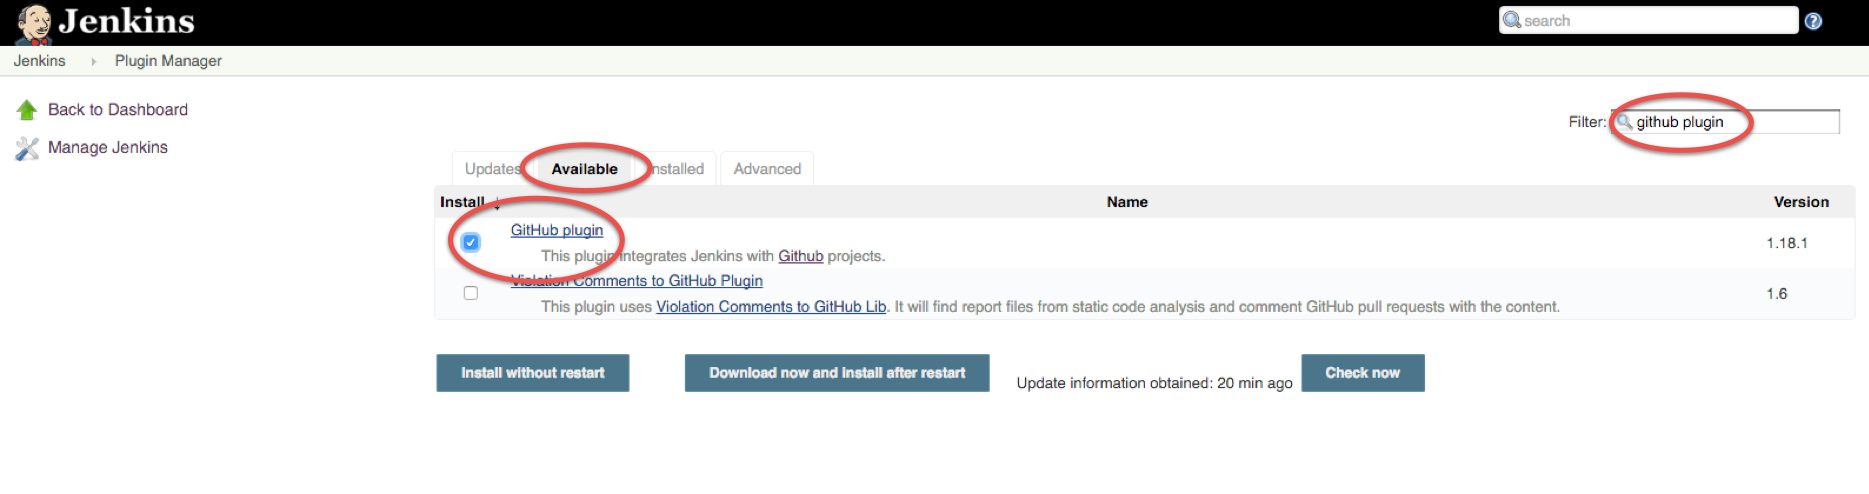
-
Also install the Cloud Foundry Plugin. Select it and click
Install without restart.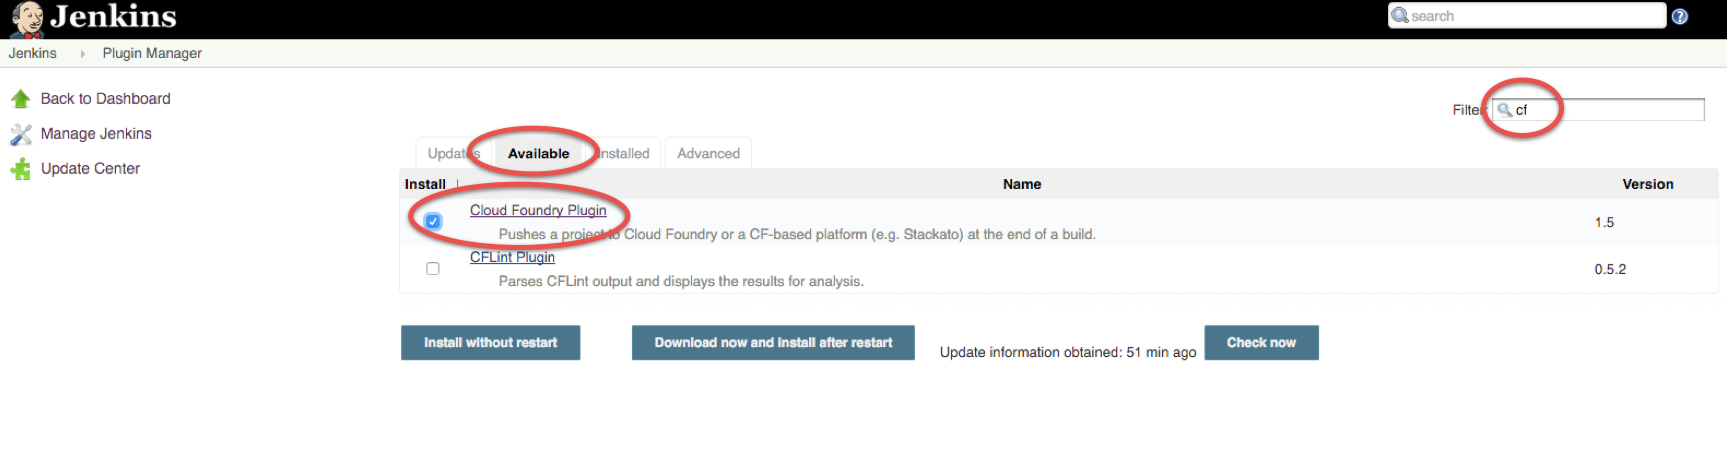
-
From the
Manage Jenkinspage, click onConfigure System. Scroll down to theMavensection, and click theAdd Mavenbutton.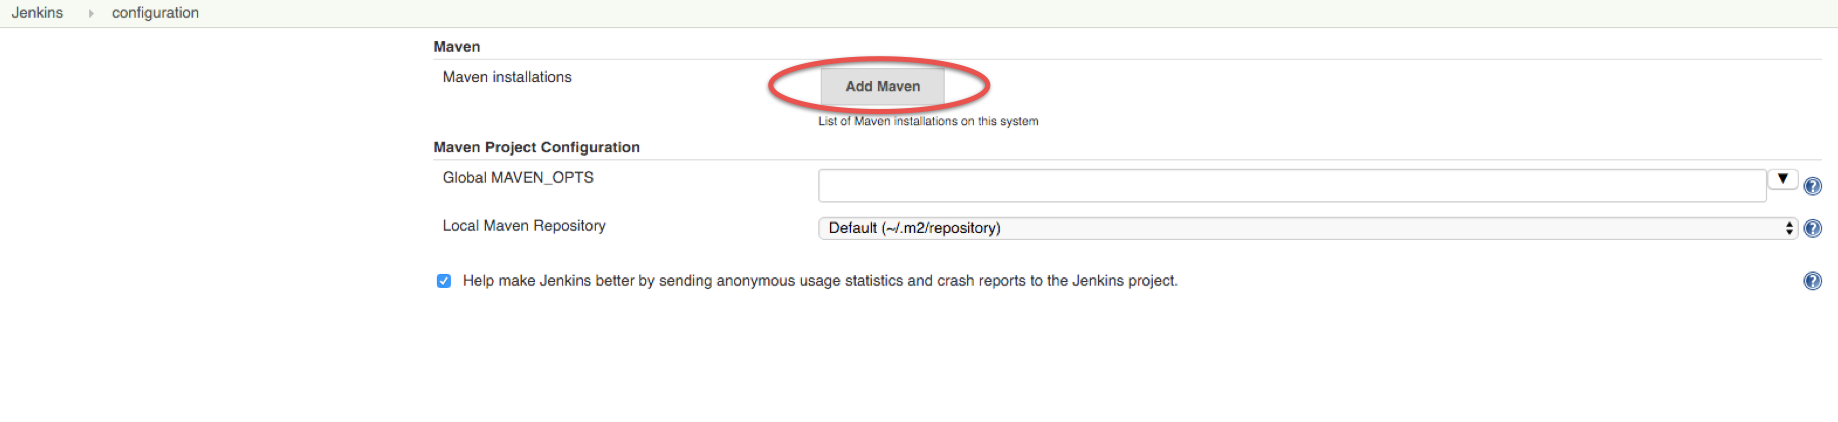
-
Enter a name into the name field then, at the bottom of the page, click
Save.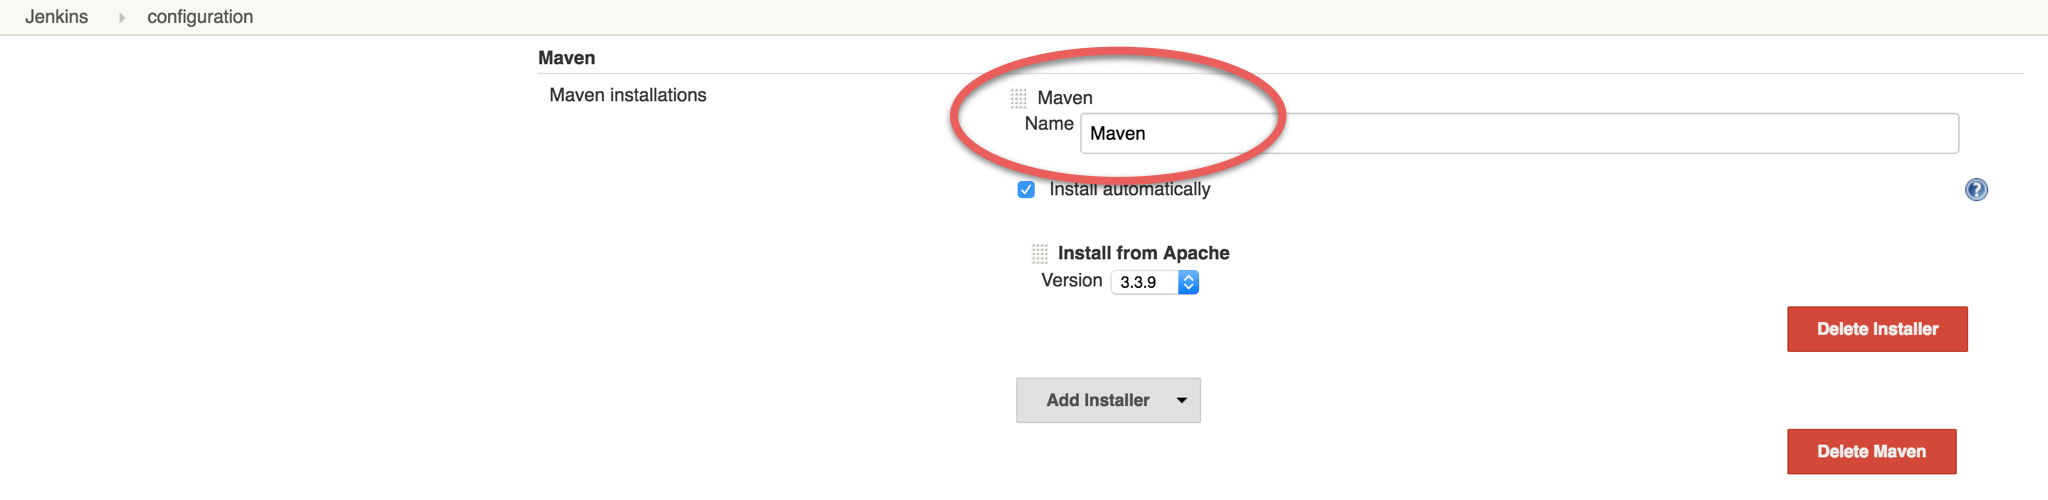
2.5. Create Build Job
-
From the Jenkins dashboard, click
New Item(in top left corner), name itarticulate-{{initials}}and selectMaven projectThen clickOK. -
Under
Source Code Management, selectGit, and supply your forked repository URL.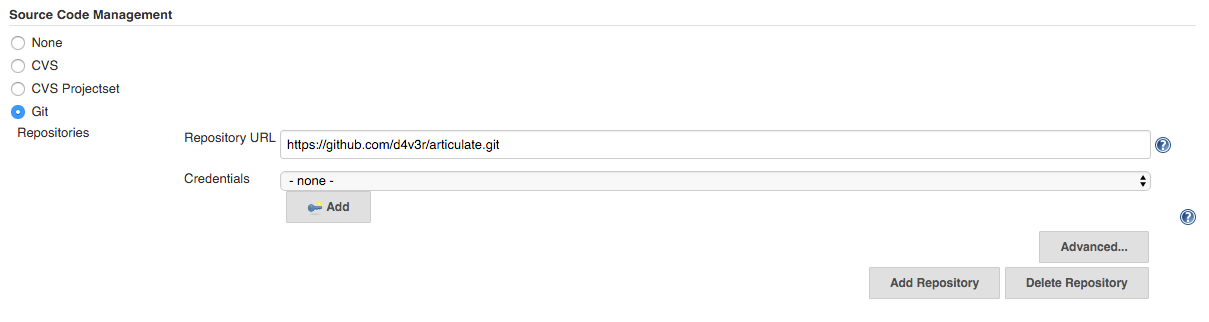
-
Under
Build Triggers, selectPoll SCM. In theSchedule, enter the CRON formatted string such as* * * * *. This will poll your Github repository every minute for changes, and if any are detected, will execute the build.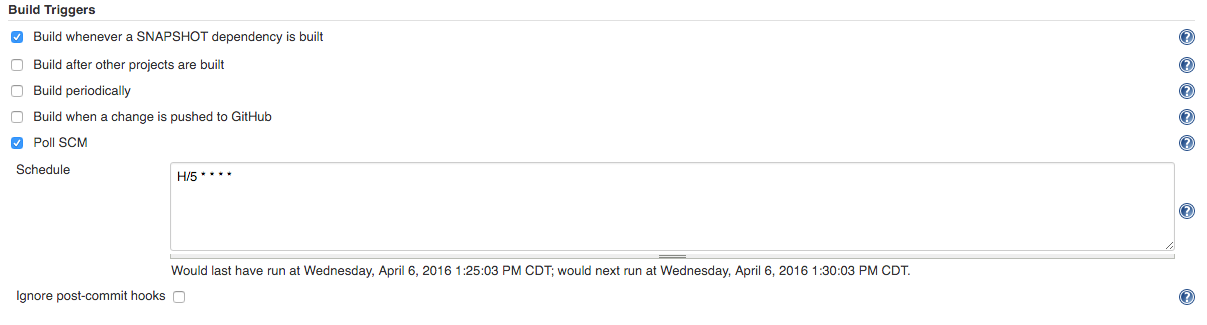
-
Under
Build, add the project path to theRoot POM, so it becomespom.xml.
-
Under
Post-build Actions, click theAdd post-build action, and selectPush to Cloud Foundry. -
Fill in the parameters to target and log into the Cloud Foundry instance you’ll be using. You will have to add your credentials. Test the connection to make sure you can connect. Also check the
Reset app if already existscheckbox. This allows for app bits and configuration to be updated/reset with each deployment; creating a more dependable way to redeploy the application (see the context sensitive help in Jenkins for more details). -
Make sure that
Enter configuration in Jenkinsis selected.Fill in the following fields:
-
Application Name=articulate-{{initials}} -
Memory=512M -
Hostname= come up with something original and unique -
Instance=1 -
Timeout=60 -
Services=attendee-serviceAdvanced Settings:
-
Application Path=target/articulate-0.0.1-SNAPSHOT.jar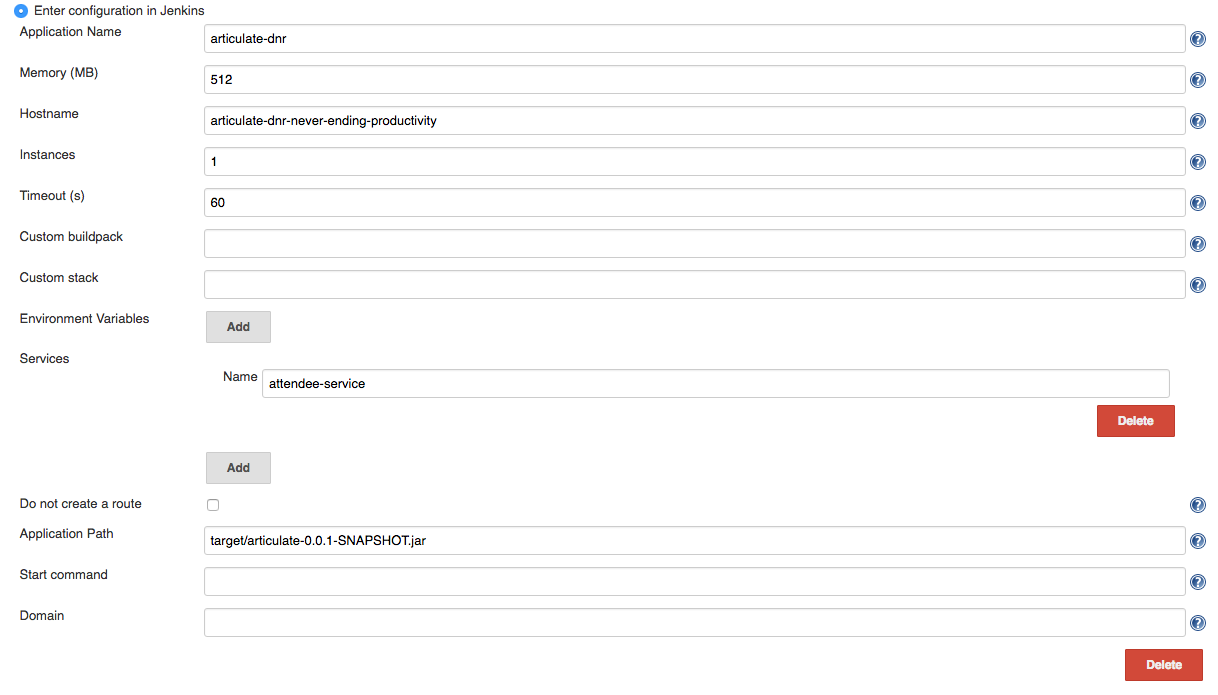
-
-
Save the config and try running the build by clicking
Build Now. Do not proceed past this step until you have a successful build and deployment to Pivotal Cloud Foundry. Confirm the application is deployed by viewing it in your browser.Make sure to view the Build details (Left Side of Screen →
Build History→Build #).Console Outputcan be viewed there (for active or completed jobs). This is very useful for debugging failing builds.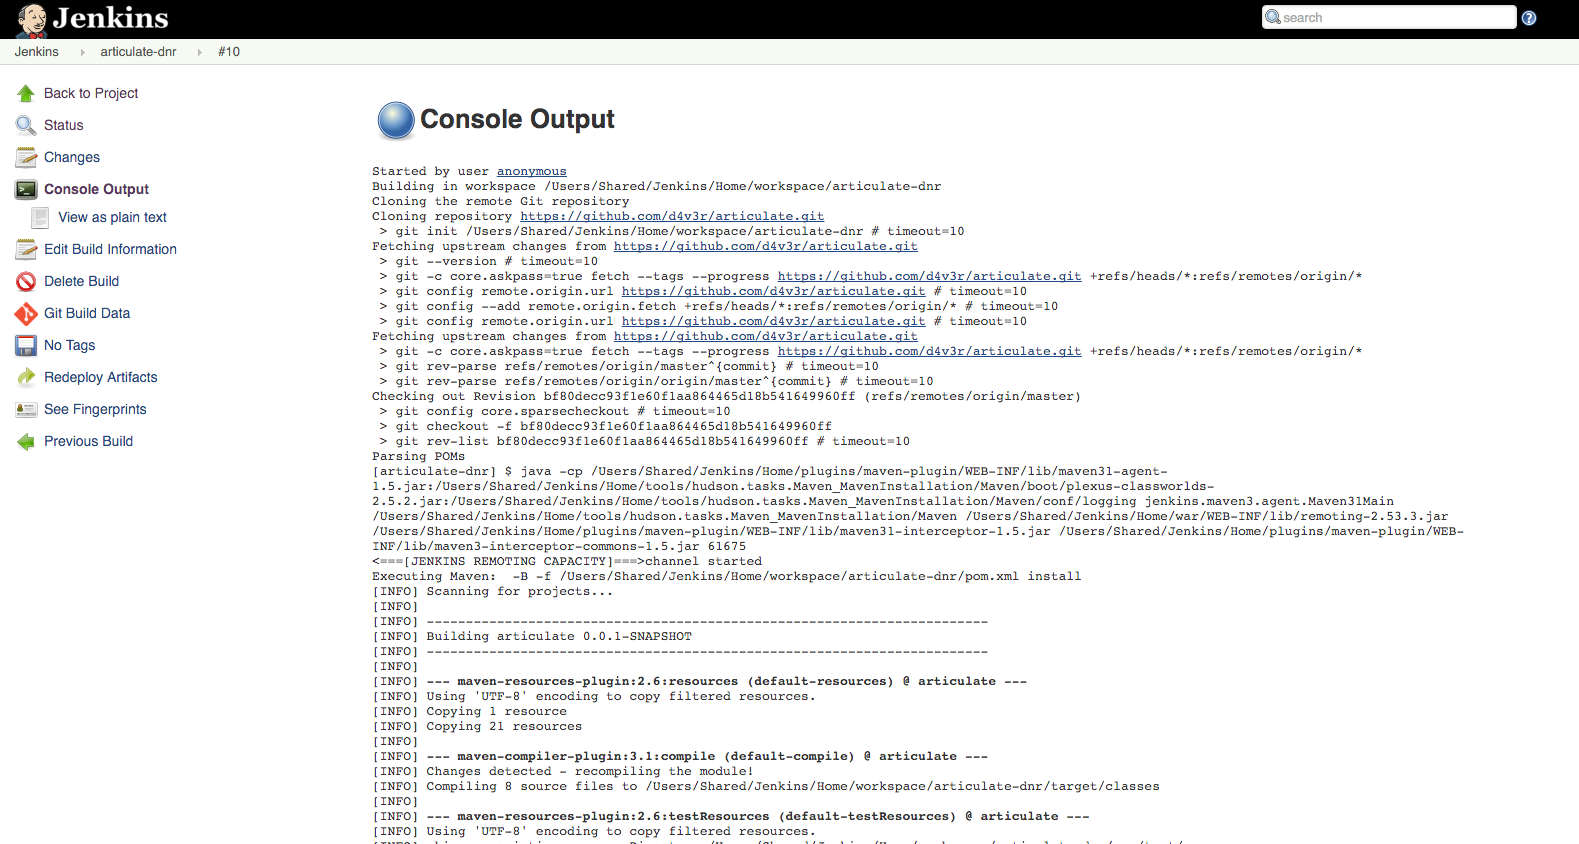
-
In your forked repo, edit the Welcome message for Articulate.
-
Edit the following file (can be done with a browser): https://github.com/{{github_username}}/pcf-articulate-code/blob/master/src/main/resources/templates/index.html
-
Change the welcome message from
Welcome to Articulate!toWelcome to My Articulate Application!Commit and push the change to GitHub, wait until the polling detects it, and watch the magic. Verify the build in Jenkins now succeeds. Also verify your change in the deployed application with a browser.
-
Congratulations, you have finished this exercise!
2.6. Questions
-
What are some of the benefits of continuous delivery?
-
Does continuous delivery mean continuous deployment?
2.7. Cleanup
-
Delete the application that the pipeline deployed. For example:
cf delete articulate-{{initials}} -
If provisioned, terminate your AWS Jenkins instance by going to your AWS EC2 dashboard, selecting the Jenkins instance, and clicking Actions → Instance State → Terminate.
3. Beyond the Class
The CD exercise above is very simplistic and should be expanded for real projects.
3.1. Artifact Repository
-
Ideally, you want to build your artifacts (jars/wars) and publish them to a repository like Artifactory.
-
Artifacts should be versioned to match the app deployments on PCF.
-
All pushes to PCF should be using the same artifacts. Artifacts should be built once and used throughout the lifecycle.
3.2. Code promotion
-
Jobs should be established in Jenkins to deploy/promote code to different phases like dev to test to prod.
-
Jobs should use the same artifact published to Artifactory.
-
Jobs can be triggered automatically or manually but should be fully automated. There should be no manual steps beyond clicking
build now.
3.3. Notification
-
Jenkins supports many notification plugins. It is important for code owners to be aware of build status.
3.4. Pivotal Cloud Foundry
Try out the CloudBees Jenkins Operations Center tile.