1. What You Will Learn
-
How to embed Eureka in a Spring Boot application
-
How to register services (
greeting-serviceandfortune-service) with Eureka -
How to discover services (
fortune-service) with Eureka -
How to use Spring Cloud Services to provision a Service Registry
2. Set up the app-config Repo
-
In your
app-configrepository, create the fileapplication.ymlwith the following contents:
security:
  basic:
    enabled: false

management:
  security:
    enabled: false

logging:
  level:
    io:
      pivotal: DEBUG
Then commit and push back to Github.
3. Set up config-server
-
Start the
config-serverin a terminal window. You may have a terminal window still open from the previous lab.$ cd config-server $ mvn spring-boot:run -
Verify the
config-serveris up. Open a browser and fetch http://localhost:8888/myapp/default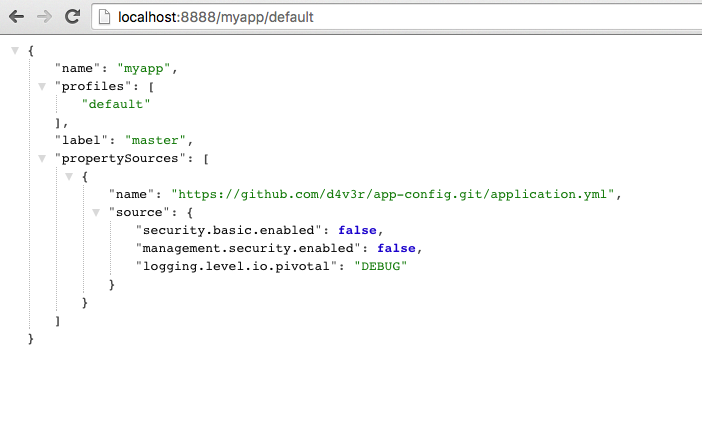
Note that a random application name was used and it picked up configuration from application.yml.
4. Set up service-registry
-
Review the
service-registryproject’s maven pom file (pom.xml).<dependency> <groupId>org.springframework.cloud</groupId> <artifactId>spring-cloud-starter-eureka-server</artifactId> </dependency>By adding
spring-cloud-starter-eureka-serveras a dependency, this application is eligible to embed a Eureka server. -
Review the file
ServiceRegistryApplication.java. Note below, the use of the@EnableEurekaServerannotation that makes this application a Eureka server.package io.pivotal; import org.springframework.boot.SpringApplication; import org.springframework.boot.autoconfigure.SpringBootApplication; import org.springframework.cloud.netflix.eureka.server.EnableEurekaServer; @SpringBootApplication @EnableEurekaServer public class ServiceRegistryApplication { public static void main(String[] args) { SpringApplication.run(ServiceRegistryApplication.class, args); } } -
Review the
application.ymlfile:server: port: 8761 eureka: instance: hostname: localhost client: registerWithEureka: false fetchRegistry: false serviceUrl: defaultZone: http://${eureka.instance.hostname}:${server.port}/eureka/The above configuration configures Eureka to run in standalone mode.
Understanding the configuration parameters-
eureka.instance.hostname- the hostname for this service. In this case, what host to use to reach our standalone Eureka instance. -
eureka.client.registerWithEureka- should this application (our standalone Eureka instance) register with Eureka -
eureka.client.fetchRegistry- should this application (our stand alone Eureka instance) fetch the registry (for how to discover services) -
eureka.client.serviceUrl.defaultZone- the Eureka instance to use for registering and discovering services. Notice it is pointing to itself (localhost,8761).
-
-
Open a new terminal window. Start the
service-registry.$ cd service-registry $ mvn spring-boot:run -
Verify the
service-registryis up. Browse to http://localhost:8761/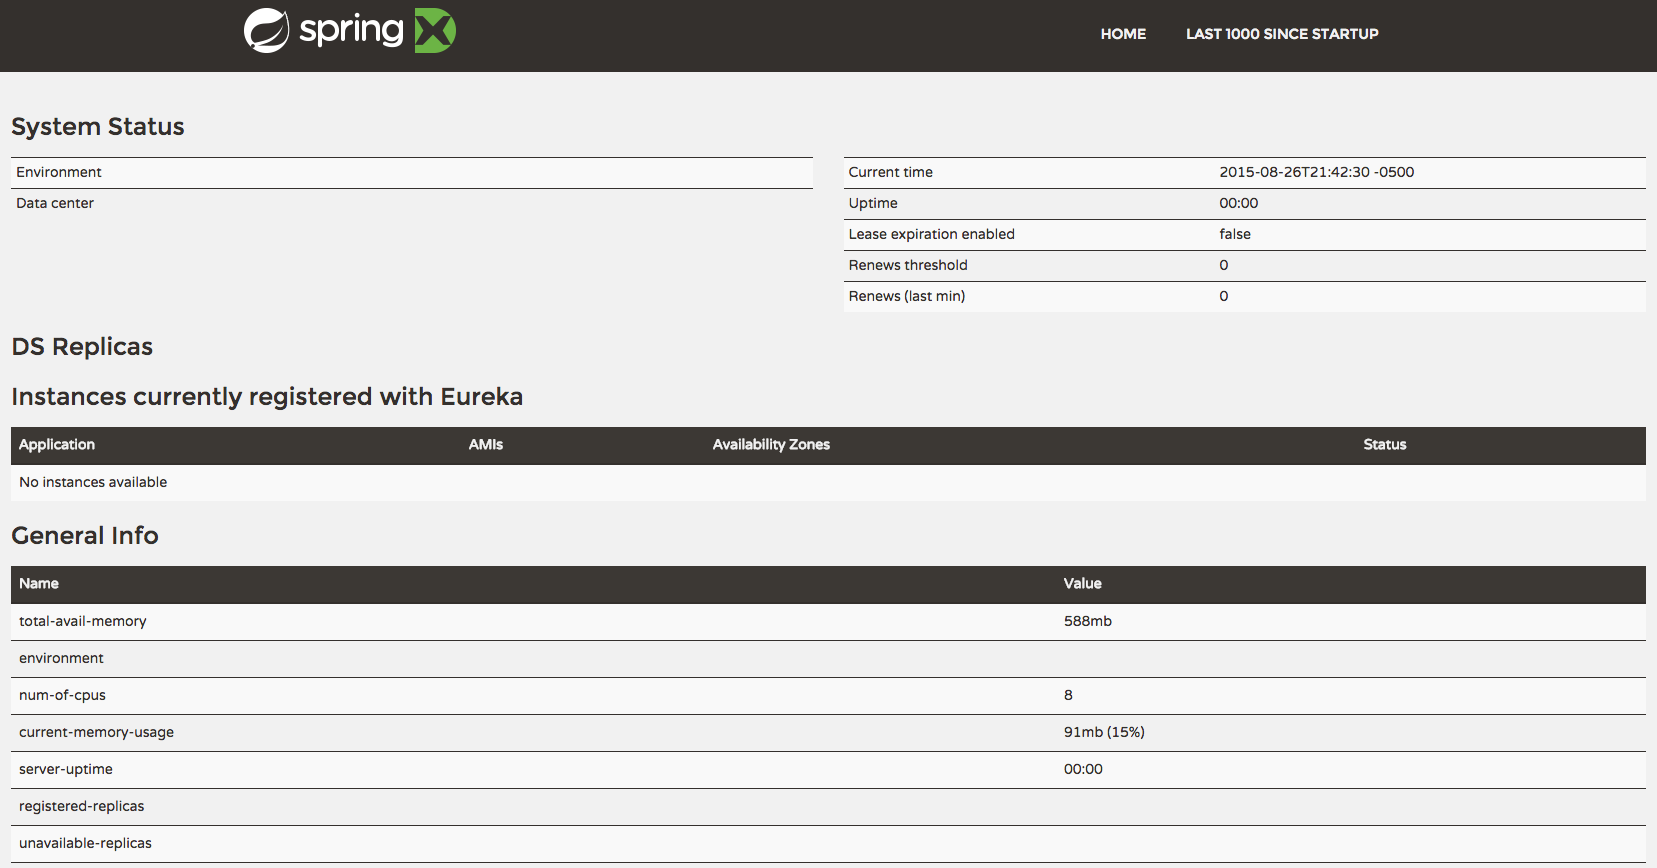
5. Set up fortune-service
-
Review the
fortune-serviceproject’sbootstrap.ymlfile. This app also uses theconfig-server.server: port: 8787 spring: application: name: fortune-servicespring.application.nameis the name the application will use when registering with Eureka. -
Review the project’s
pom.xmlfile. By addingspring-cloud-services-starter-service-registryas a dependency, this application is eligible to register and discover services with theservice-registry.<dependency> <groupId>io.pivotal.spring.cloud</groupId> <artifactId>spring-cloud-services-starter-service-registry</artifactId> </dependency> -
Review the file
FortuneServiceApplication.java. Notice the@EnableDiscoveryClient. This enables a discovery client that registers thefortune-servicewith theservice-registryapplication.package io.pivotal; import org.springframework.boot.SpringApplication; import org.springframework.boot.autoconfigure.SpringBootApplication; import org.springframework.cloud.client.discovery.EnableDiscoveryClient; @SpringBootApplication @EnableDiscoveryClient public class FortuneServiceApplication { public static void main(String[] args) { SpringApplication.run(FortuneServiceApplication.class, args); } } -
Open a new terminal window. Start the
fortune-service$ cd fortune-service $ mvn spring-boot:run -
After the a few moments, check the
service-registrydashboard. Confirm thefortune-serviceis registered.
The Eureka Dashboard may report a warning, because we aren’t setup with multiple peers. This can safely be ignored.
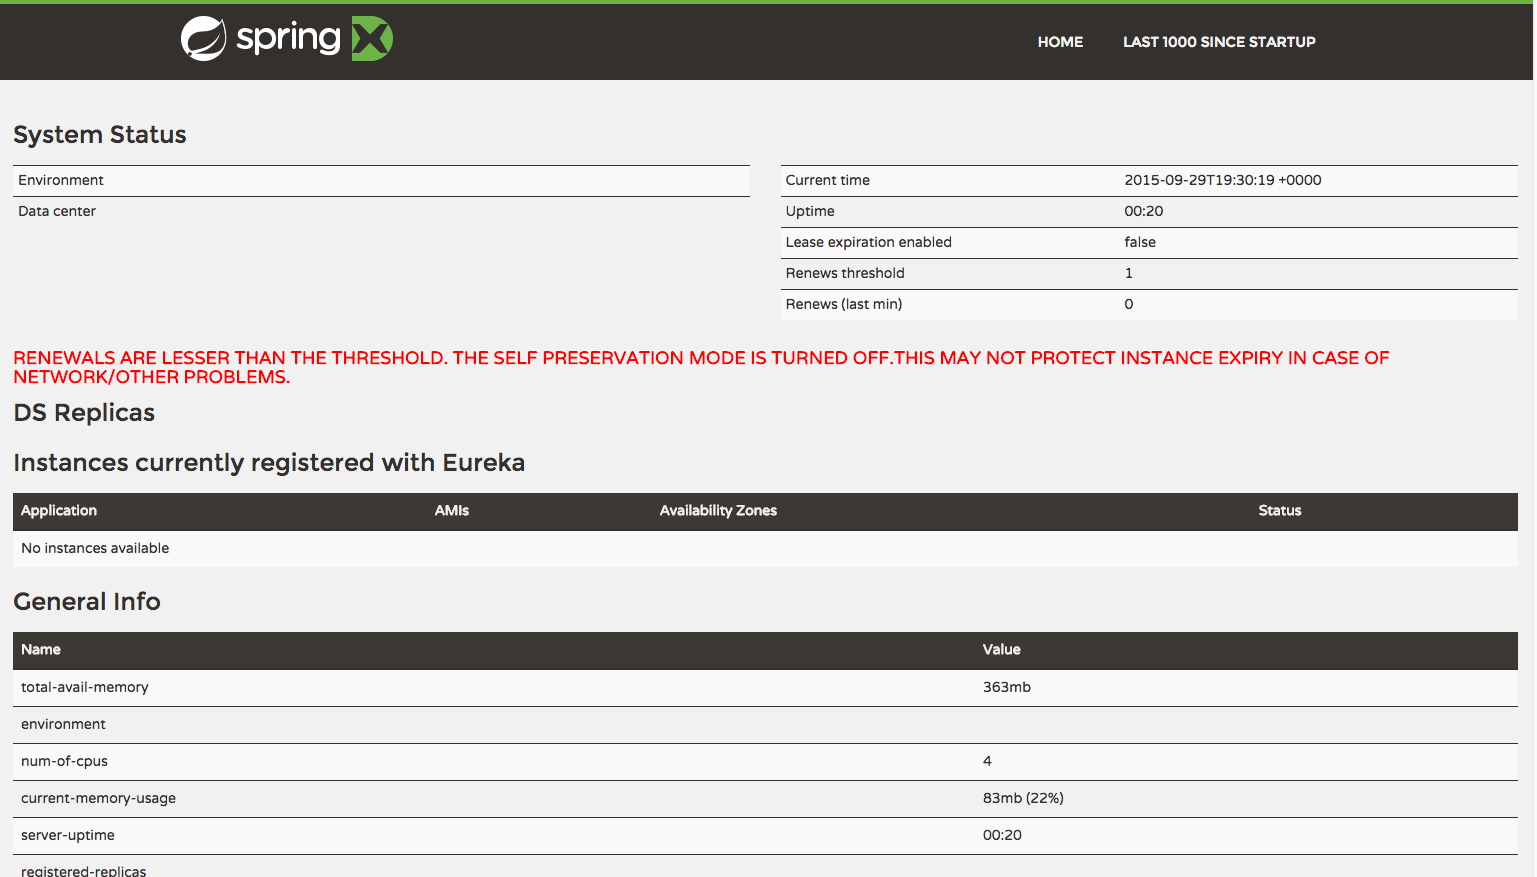
|
The endpoint http://localhost:8761/eureka/apps provides a raw (xml) view of the application registry that eureka maintains. |
6. Set up greeting-service
-
Review
greeting-serviceproject’sbootstrap.ymlfile. The name of this app isgreeting-service. It also uses theconfig-server.spring: application: name: greeting-service -
Review the
pom.xmlfile. By addingspring-cloud-services-starter-service-registry, this application is eligible to register and discover services with theservice-registry.<dependency> <groupId>io.pivotal.spring.cloud</groupId> <artifactId>spring-cloud-services-starter-service-registry</artifactId> </dependency> -
Review the file
GreetingServiceApplication.java. Notice the@EnableDiscoveryClient. This enables a discovery client that registers thegreeting-serviceapp with theservice-registry.package io.pivotal; import org.springframework.boot.SpringApplication; import org.springframework.boot.autoconfigure.SpringBootApplication; import org.springframework.cloud.client.discovery.EnableDiscoveryClient; @SpringBootApplication @EnableDiscoveryClient public class GreetingServiceApplication { public static void main(String[] args) { SpringApplication.run(GreetingServiceApplication.class, args); } } -
Review the file
GreetingController.java. Notice theEurekaClient. TheEurekaClientis used to discover services registered with theservice-registry. Review the methodfetchFortuneServiceUrl()below.package io.pivotal.greeting; import com.netflix.appinfo.InstanceInfo; import com.netflix.discovery.EurekaClient; import org.slf4j.Logger; import org.slf4j.LoggerFactory; import org.springframework.stereotype.Controller; import org.springframework.ui.Model; import org.springframework.web.bind.annotation.RequestMapping; import org.springframework.web.client.RestTemplate; @Controller public class GreetingController { private final Logger logger = LoggerFactory.getLogger(GreetingController.class); private final EurekaClient discoveryClient; public GreetingController(EurekaClient discoveryClient) { this.discoveryClient = discoveryClient; } @RequestMapping("/") String getGreeting(Model model) { logger.debug("Adding greeting"); model.addAttribute("msg", "Greetings!!!"); RestTemplate restTemplate = new RestTemplate(); String fortune = restTemplate.getForObject(fetchFortuneServiceUrl(), String.class); logger.debug("Adding fortune: {}", fortune); model.addAttribute("fortune", fortune); return "greeting"; // resolves to the greeting.ftl template } private String fetchFortuneServiceUrl() { InstanceInfo instance = discoveryClient.getNextServerFromEureka("FORTUNE-SERVICE", false); logger.debug("instanceID: {}", instance.getId()); String fortuneServiceUrl = instance.getHomePageUrl(); logger.debug("fortune service homePageUrl: {}", fortuneServiceUrl); return fortuneServiceUrl; } } -
Open a new terminal window. Start the
greeting-serviceapp$ cd greeting-service $ mvn spring-boot:run -
After the a few moments, check the
service-registrydashboard http://localhost:8761. Confirm thegreeting-serviceapp is registered.
-
Browse to http://localhost:8080/ to the
greeting-serviceapplication. Confirm you are seeing fortunes. Refresh as desired. Also review the terminal output for thegreeting-service. See thefortune-serviceinstanceIdandhomePageUrlbeing logged. -
When done, stop the
config-server,service-registry,fortune-serviceandgreeting-serviceapplications.
7. Update App Config for fortune-service and greeting-service to run on PCF
The spring cloud services configuration parameter spring.cloud.services.registrationMethod provides two distinct ways in which applications can register with Eureka:
-
route: The application registers using its Cloud Foundry url. This is the default. -
direct: The application registers using its host IP and port.
In PCF, it makes sense to think about using the route method. With the route registration method, applications that need the services of other applications deployed in cloud foundry are given their route urls. This ensures that calls to those applications are routed through the cloud foundry GoRouter. The principal benefit of this option is that the platform takes care of load balancing requests across multiple instances of a scaled microservice.
Even though this option is the default, let’s go ahead and set it explicitly. In your app-config repository, add a section to the application.yml file as shown below (and push back to GitHub):
security:
  basic:
    enabled: false

management:
  security:
    enabled: false

logging:
  level:
    io:
      pivotal: DEBUG

spring: # <---NEW SECTION
  cloud:
    services:
      registrationMethod: route
8. Deploy the fortune-service to PCF
-
Package
fortune-servicemvn clean package -
Deploy
fortune-service.cf push fortune-service -p target/fortune-service-0.0.1-SNAPSHOT.jar -m 768M --random-route --no-start -
Create a Service Registry Service Instance. The
service-registryservice instance will not be immediately bindable. It needs a few moments to initialize.cf create-service p-service-registry standard service-registryClick on the Services tab and the Service Registry entry to navigate to your service.
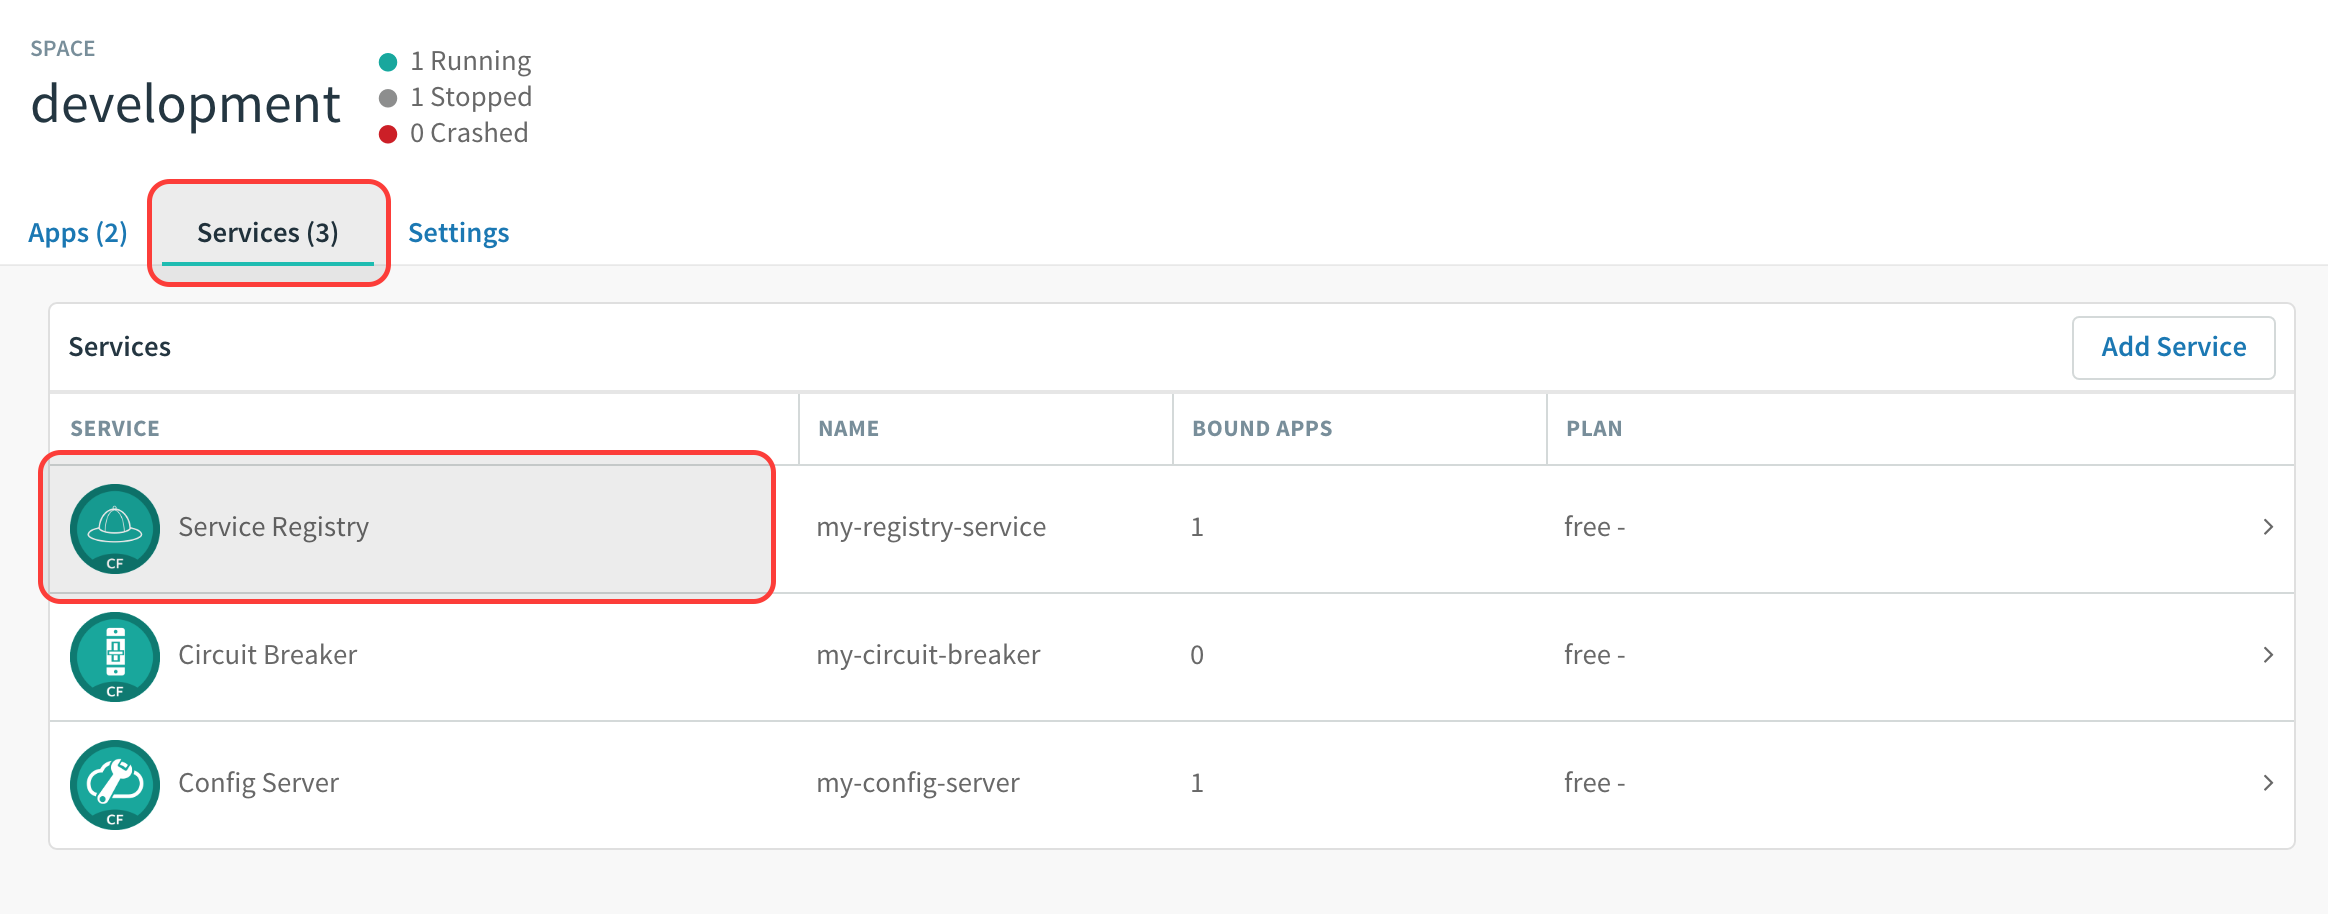
Then, click on the Manage link to determine when the
service-registryis ready.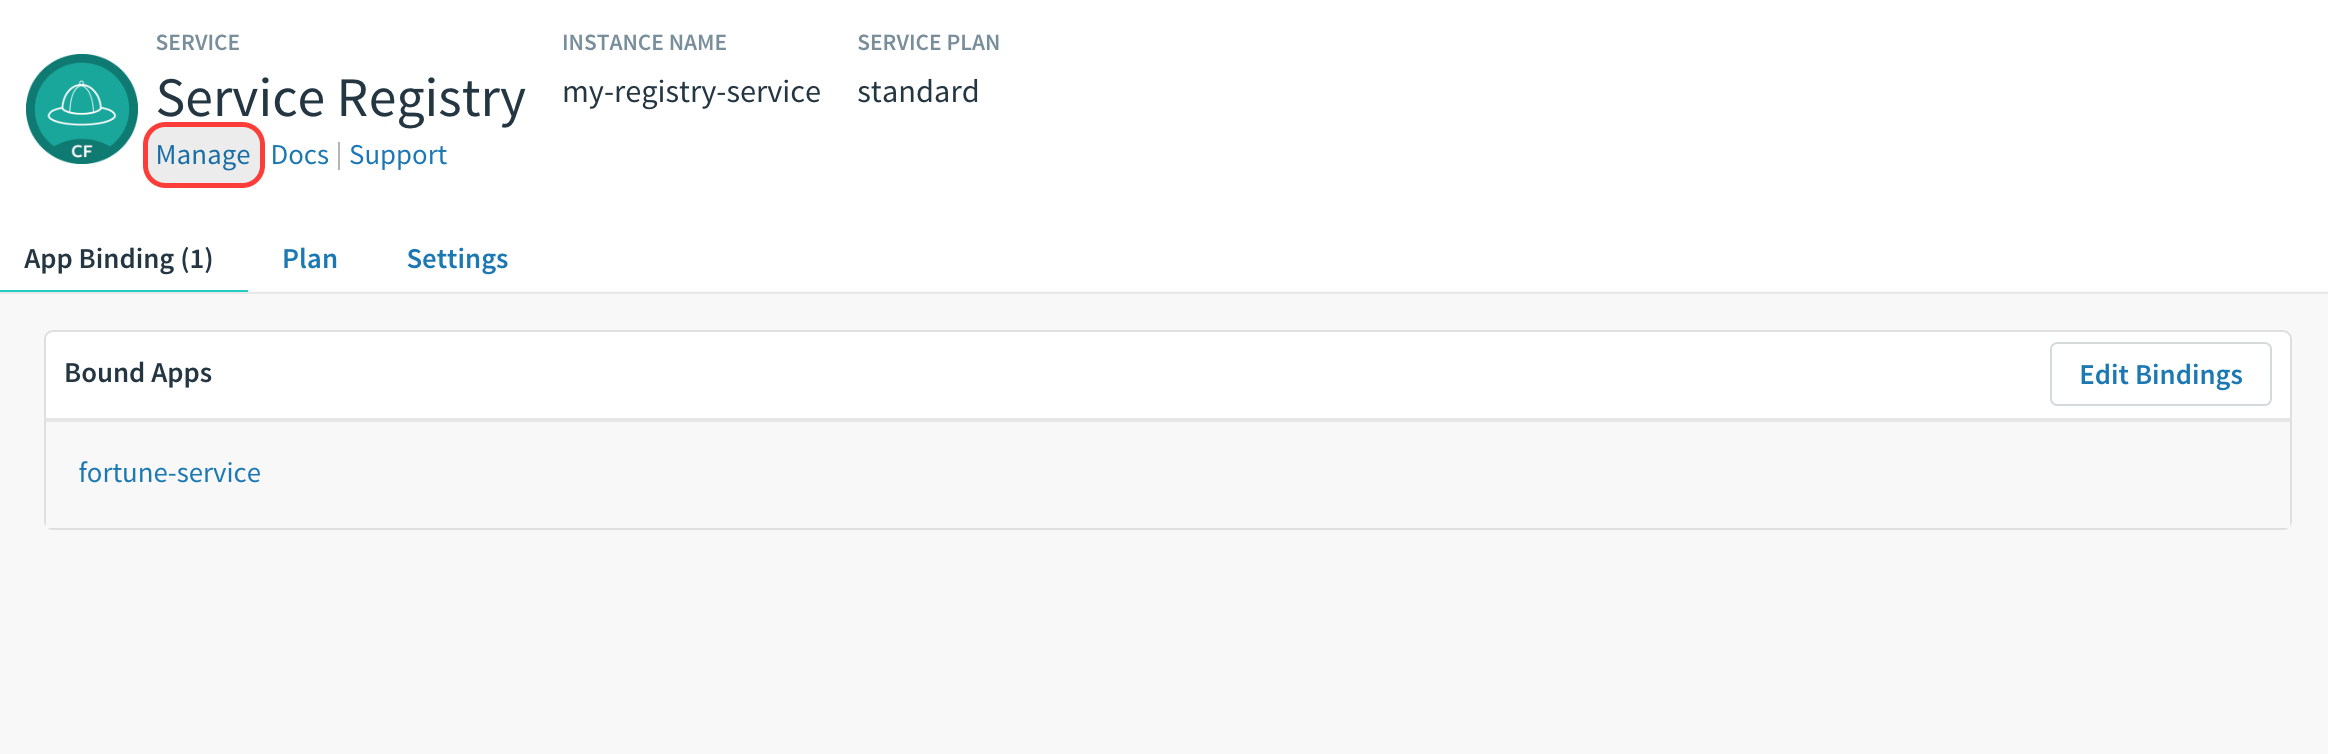
Spring Cloud Services in PCF are implemented asynchronously. This means that it takes some time after invoking the
create-servicecommand before the service is online and available. The commandcf servicescan be used to monitor the progress of the service creation. You must wait until the service has been created successfully before proceeding with binding applications to these services. If you don’t, you’re likely to see a message similar to this:Binding service service-registry to app fortune-service in org dave / space dev as droberts@pivotal.io... FAILED Server error, status code: 502, error code: 10001, message: Service broker error: Service instance is not running and available for binding. -
Bind services to the
fortune-service.cf bind-service fortune-service config-serverand:
cf bind-service fortune-service service-registryYou can safely ignore the TIP: Use 'cf restage' to ensure your env variable changes take effect message from the CLI. We don’t need to restage at this time.
-
Start the
fortune-serviceapp.cf start fortune-service -
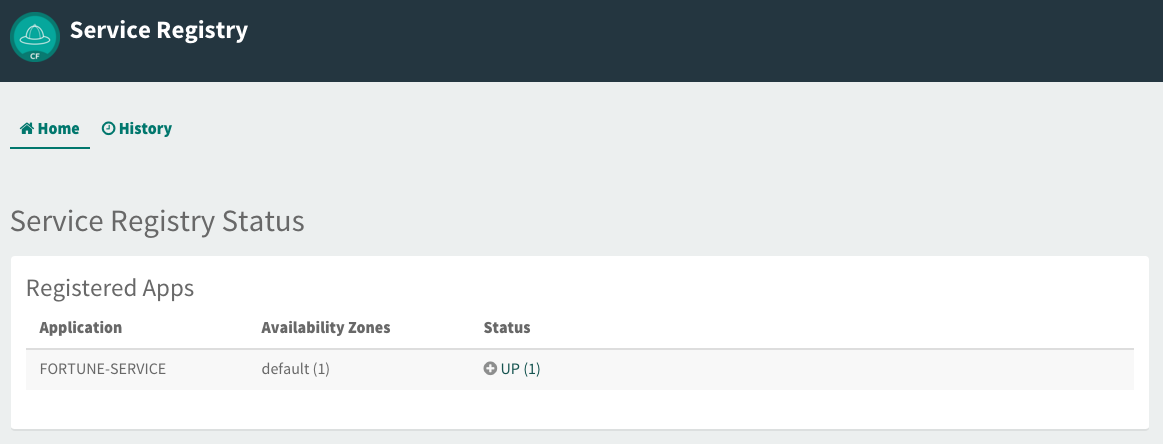
Confirm
fortune-serviceregistered with theservice-registry. This will take a few moments.Click on the Manage link for the
service-registry. You can find it by navigating to the space where your applications are deployed.
9. Deploy the greeting-service app to PCF
-
Package
greeting-servicemvn clean package -
Deploy
greeting-service.cf push greeting-service -p target/greeting-service-0.0.1-SNAPSHOT.jar -m 768M --random-route --no-start -
Bind services for the
greeting-service.cf bind-service greeting-service config-serverand:
cf bind-service greeting-service service-registryYou can safely ignore the TIP: Use 'cf restage' to ensure your env variable changes take effect message from the CLI. We don’t need to restage at this time.
-
Start the
greeting-serviceapp.cf start greeting-service -
Confirm
greeting-serviceregistered with theservice-registry. This will take a few moments.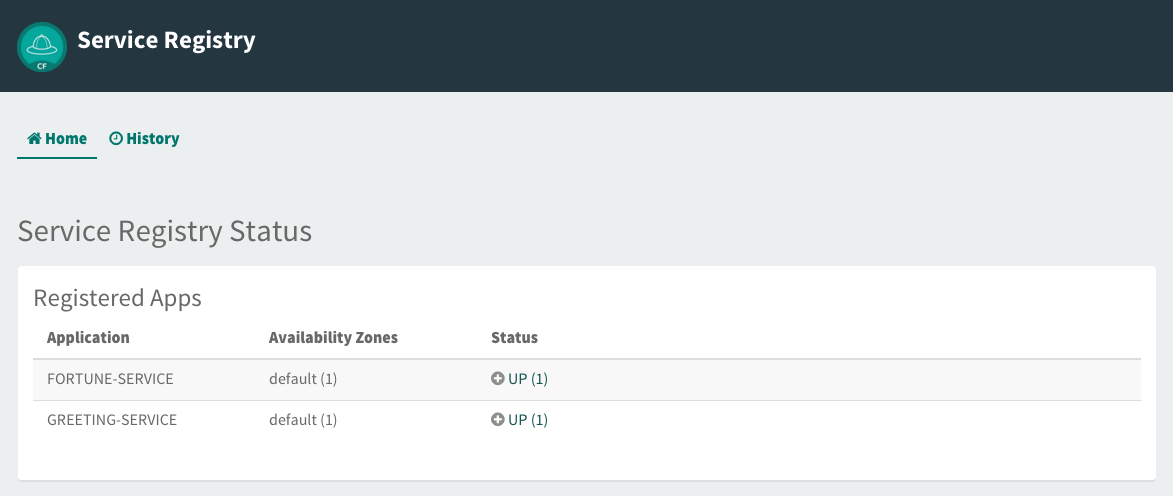
-
Browse to the
greeting-serviceapplication. Confirm you are seeing fortunes. Refresh as desired.
10. Scale the fortune-service
-
Scale the
fortune-serviceapp instances to 3.cf scale fortune-service -i 3 -
Wait for the new instances to register with the
service-registry. This will take a few moments. -
Tail the logs for the
greeting-serviceapplication.cf logs greeting-service | grep GreetingController -
Refresh the
greeting-serviceroot endpoint. -
Observe the log output. Compare the
instanceIDvalues across log entries. With each refresh, theGreetingControllerobtains a different eureka-registered instance of thefortune-serviceapplication. Note however that thehomePageUrlvalue is the same across multiple instances.Log output fragment, abridged[APP/PROC/WEB/0] GreetingController : Adding greeting [APP/PROC/WEB/0] GreetingController : instanceID: eitan-fortune-service.cfapps.io:5fd41912-9480-417e-7d3e-6af3 [APP/PROC/WEB/0] GreetingController : Adding fortune: You can always find happiness at work on Friday [APP/PROC/WEB/0] GreetingController : fortune service homePageUrl: http://eitan-fortune-service.cfapps.io:80/ [APP/PROC/WEB/0] GreetingController : Adding greeting [APP/PROC/WEB/0] GreetingController : instanceID: eitan-fortune-service.cfapps.io:86de654a-a134-4441-5b8a-94c9 [APP/PROC/WEB/0] GreetingController : fortune service homePageUrl: http://eitan-fortune-service.cfapps.io:80/ [APP/PROC/WEB/0] GreetingController : Adding fortune: You learn from your mistakes... You will learn a lot today. [APP/PROC/WEB/0] GreetingController : Adding greeting [APP/PROC/WEB/0] GreetingController : instanceID: eitan-fortune-service.cfapps.io:f0f68392-d20b-4f9d-67d6-cbc4 [APP/PROC/WEB/0] GreetingController : fortune service homePageUrl: http://eitan-fortune-service.cfapps.io:80/ [APP/PROC/WEB/0] GreetingController : Adding fortune: You will be hungry again in one hour. [APP/PROC/WEB/0] GreetingController : Adding greeting [APP/PROC/WEB/0] GreetingController : instanceID: eitan-fortune-service.cfapps.io:5fd41912-9480-417e-7d3e-6af3 [APP/PROC/WEB/0] GreetingController : fortune service homePageUrl: http://eitan-fortune-service.cfapps.io:80/ [APP/PROC/WEB/0] GreetingController : Adding fortune: You will be hungry again in one hour. [APP/PROC/WEB/0] GreetingController : Adding greeting [APP/PROC/WEB/0] GreetingController : fortune service homePageUrl: http://eitan-fortune-service.cfapps.io:80/ [APP/PROC/WEB/0] GreetingController : instanceID: eitan-fortune-service.cfapps.io:86de654a-a134-4441-5b8a-94c9 [APP/PROC/WEB/0] GreetingController : Adding fortune: You learn from your mistakes... You will learn a lot today. ..If you are not seeing this behavior, make sure that your logging level is set to
DEBUGand you have refreshed the configurations for the greeting service.